Automatically collect opt outs
Infobip automatically collects opt outs according to the rules you define. For example, this includes opt outs based on keywords, URLs, and events from Moments.
Contacts and destinations can be collected by Infobip. First, create the rules on which Infobip will collect them. When you enable the rules, Infobip then handles the Blocklist using the opt out information.
The ways opt outs are collected depend on your use case, country regulations, and the channels and senders you use to communicate with end users.
The following sections describe automatic collection of opt outs for:
- Keyword-based rules (MO)
- URL opt out
- Event-based triggers in communication flow
Keyword-based rules (MO)
When you use a keyword trigger, if an end user replies with the specific keyword (for example, STOP), the end user's contact information is automatically added to the Blocklist. The same contact can resubscribe again with a specific keyword (for example, START).
These steps show you how to add a keyword to trigger a rule that automatically adds the end user to the Blocklist:
-
Go to Channels and Numbers, then select Numbers.
-
Select a sender from the sender list for which you want to set up the keyword-based rule.
-
In the Inbound configuration section, select the plus sign next to Keywords.
-
Define the keyword. In this example, the keyword is STOP.
-
Select Non-forwarding action as Blocking action. Ensure that the Type is set to Add to Blocklist.
-
Choose the level of blocking at the account level or the number level:
- From any sender: end users will not receive messages from your account
- From this sender: end users will not receive messages from this number
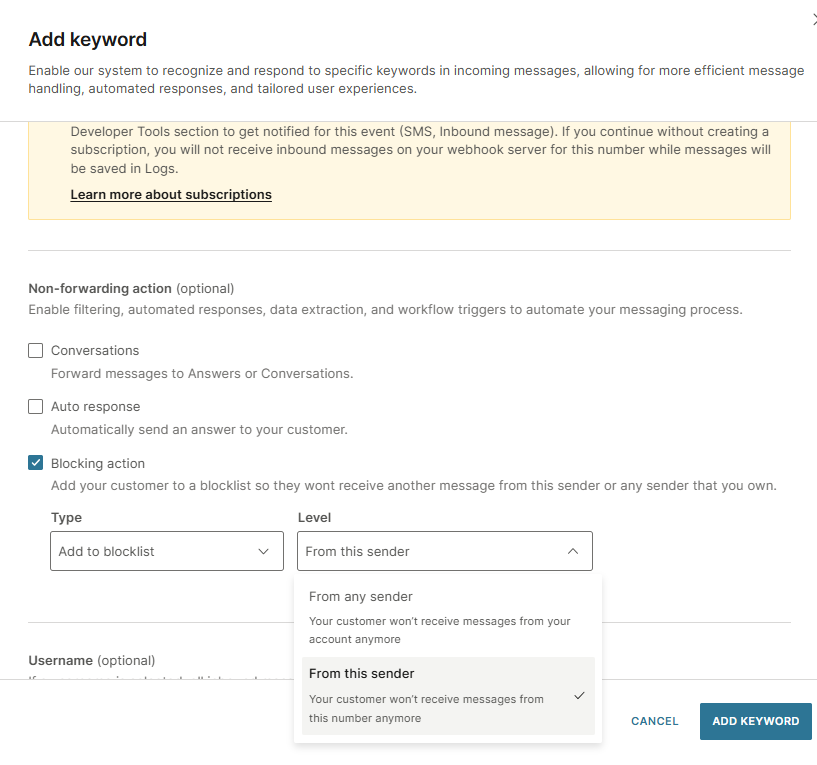
-
Click Add Keyword.
For more information, see Messaging actions.
URL opt out
You can add an opt out link in a message so that when an end user clicks the opt out link, they are added to the Blocklist automatically. This is usually used when the sender is not two-way enabled, but you want to give end users the option to opt out (for example, alphanumeric senders).
To get the URL opt out feature, contact Support@infobip.com.
Event-based triggers in communication flow
Contacts and destinations are automatically added using trigger events from a communication flow. When you enable these triggers, Infobip then handles the Blocklist using the opt out information.
A trigger event in a Flow can include:
- End users unsubscribe by replying with a specific keyword, for example, STOP
- End users click an opt out link included in the message
- End users do not open the message in the specified time
To use a trigger event in a Flow, you include an element called Add to Do Not Contact list.
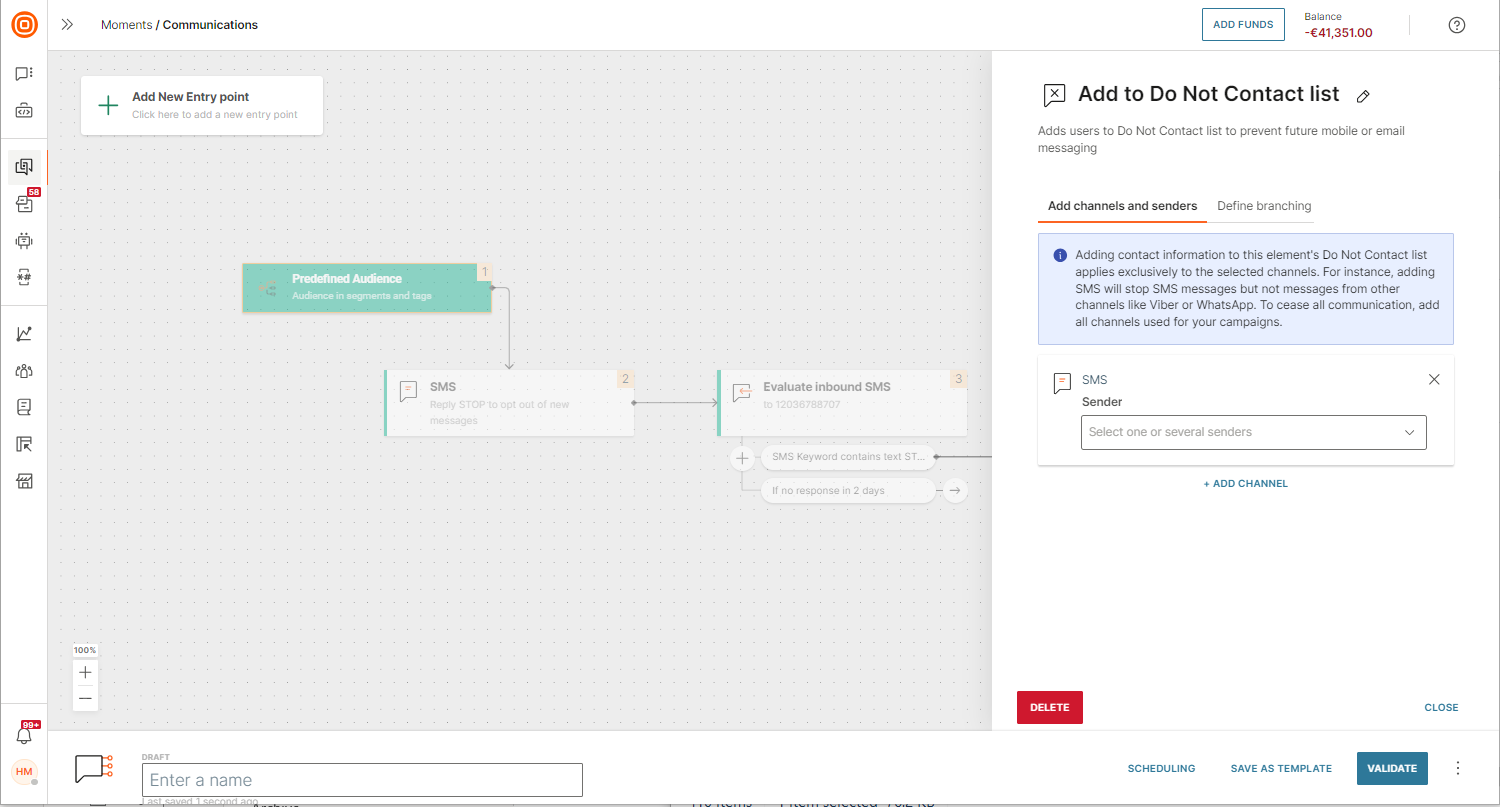
When you use a keyword trigger, if an end user replies with the specific keyword (for example, STOP), the Add to Do Not Contact list element is activated and the end user's number or email is automatically added to the Do Not Contact list.
For more information about using event triggers in Flows to add contacts to the Blocklist, see Moments.