Use an AI assistant in your chatbot
To use an AI assistant in your chatbot, add the AI assistant element.
The process is as follows:
- In your chatbot, save the end user's message in an attribute.
- Add the AI assistant element and configure it. In the AI assistant element, pass the attribute as an input to the AI assistant.
- The assistant generates a response based on the input, the assistant configuration, and the documentation uploaded to the assistant.
- In the AI assistant element, get the response from the assistant and save it in a different attribute.
- Send the response to the end user.
Save end user's message in an attribute [#save-user-input-in-attribute]
To save the message, follow one of these options:
- Use the predefined attribute
lastReceivedTextMessage, which captures the last message sent by the end user. - Save the end user's response in a standard attribute by using the Save user response element.
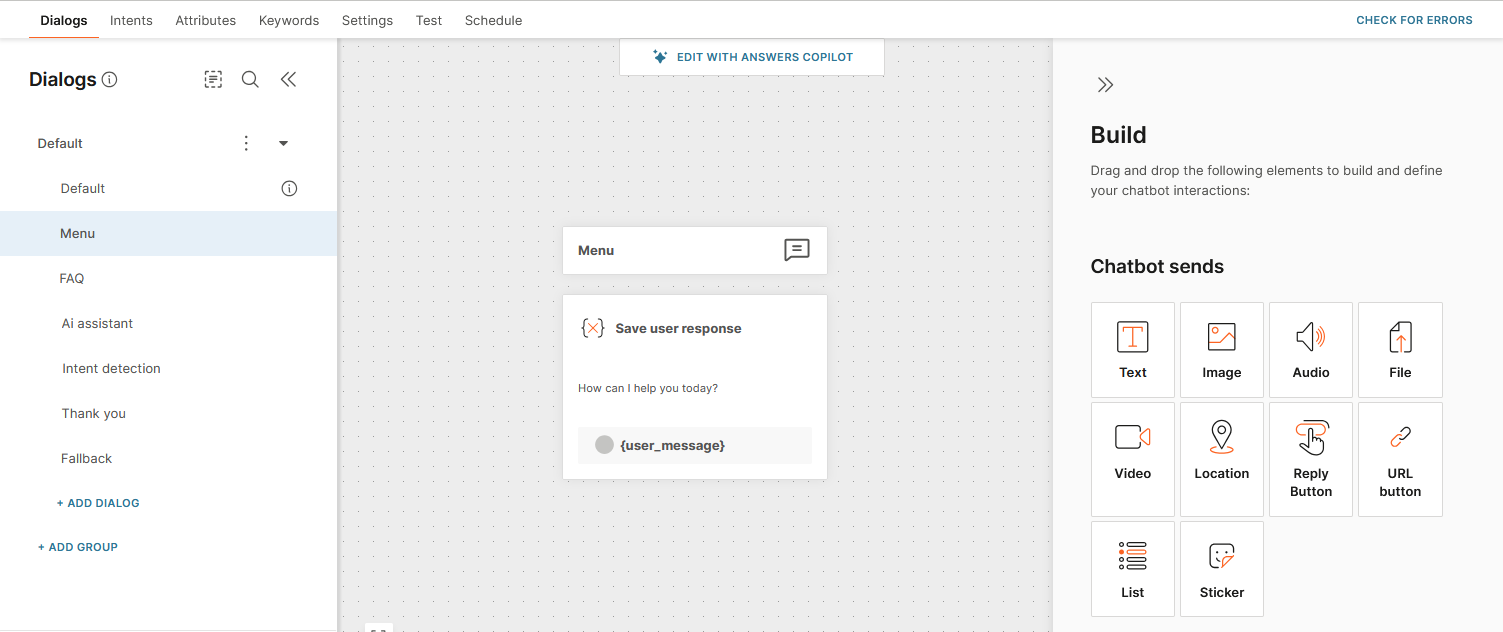
The following image shows the end user's message saved in an attribute:
Add the AI assistant element to your chatbot [#add-assistant-to-chatbot]
Use the AI assistant element to add an AI assistant to your chatbot.
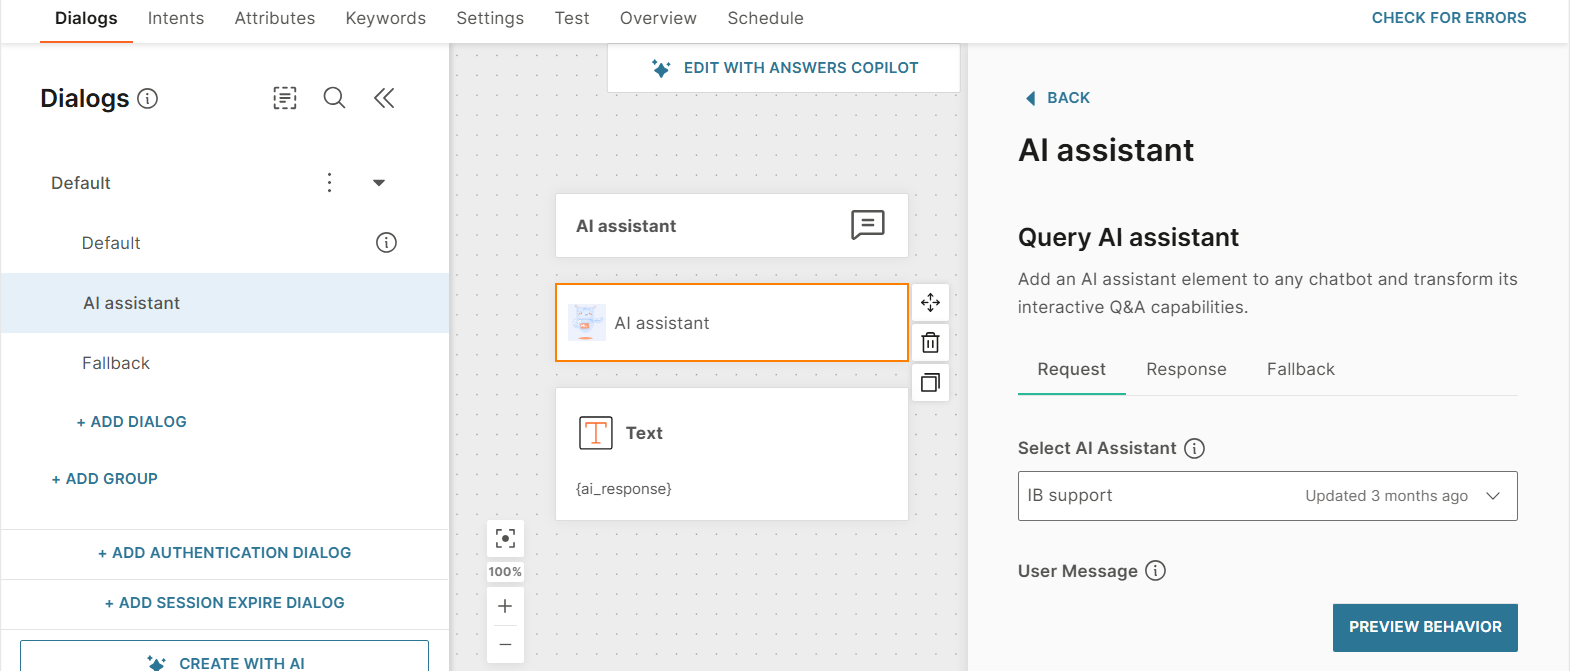
The following image shows the AI assistant element in the chatbot editor:
Guidelines [#guidelines-add-assistant]
Note the following:
- Select only one AI assistant in the element.
- Add only one AI assistant element to a dialog.
- Use more than one AI assistant in your chatbot, if needed.
Configure the AI assistant element [#configure-ai-assistant-element]
Configure the AI assistant element as follows:
Configure the basic fields
-
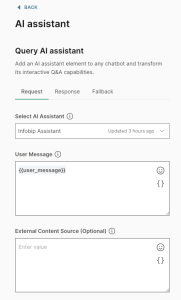
Select an assistant from the list.
-
In the User message field, select the attribute in which the end user's message is stored. The chatbot sends this attribute value to the AI assistant service.
Configure additional options
Set the following optional fields:
-
External content source: If you set this source, the AI assistant ignores data that is defined in its main content source, and uses the external content source instead.
-
Memory key: Use the memory key to share memory between assistants and other GenAI components that have the same key.
-
Return contexts: If you set this field to True, the assistant returns the parts of the documentation that were used to generate the response.
-
Prompt variable: Use this field if the Prompt template section in the selected AI assistant contains
{prompt_var}. The chatbot passes the value from the Prompt variable field to{prompt_var}. This helps you personalize chats or give context to the AI assistant.Example: In the Prompt variable field, add
Refer to the end user as {{name}}.
Save the assistant response
The AI assistant returns an answer to the user question in a JSON schema:
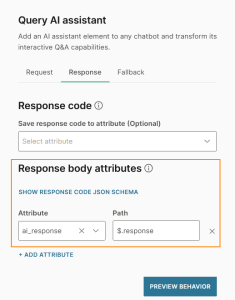
Extract the response and save it by using Response body attributes. To extract the response text, select the attribute in which to save the response. Then, define the JSON path.
Example: $.response.
The following image shows the response saved in an attribute:
You can use the JSON response and the extracted value for further processing, or return the value to the end user.
Add fallback
The chatbot triggers the fallback action if the AI assistant service is not responding. You can either redirect the end user to a different dialog or transfer the conversation to an agent.
For more information, see the Add fallback documentation in Answers.
Send the response to the end user [#share-assistant-response-with-user]
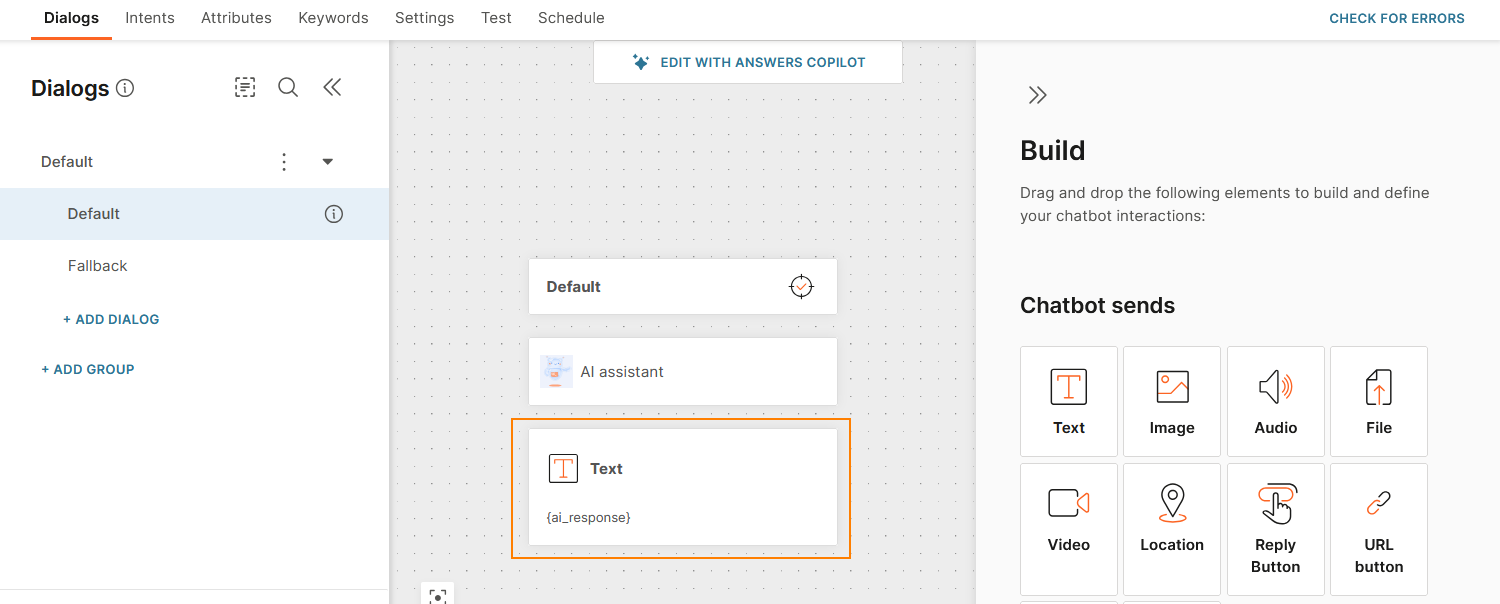
To return the response from the assistant, use a Text element and add the attribute in which you saved the response.
The following image shows the response in a Text element:
Create conversational AI chatbots [#conversational-chatbot]
To configure a more advanced AI assistant experience, use other Infobip Generative AI tools.
Example:
After the assistant answers the end user's question, send the response in a Text element.
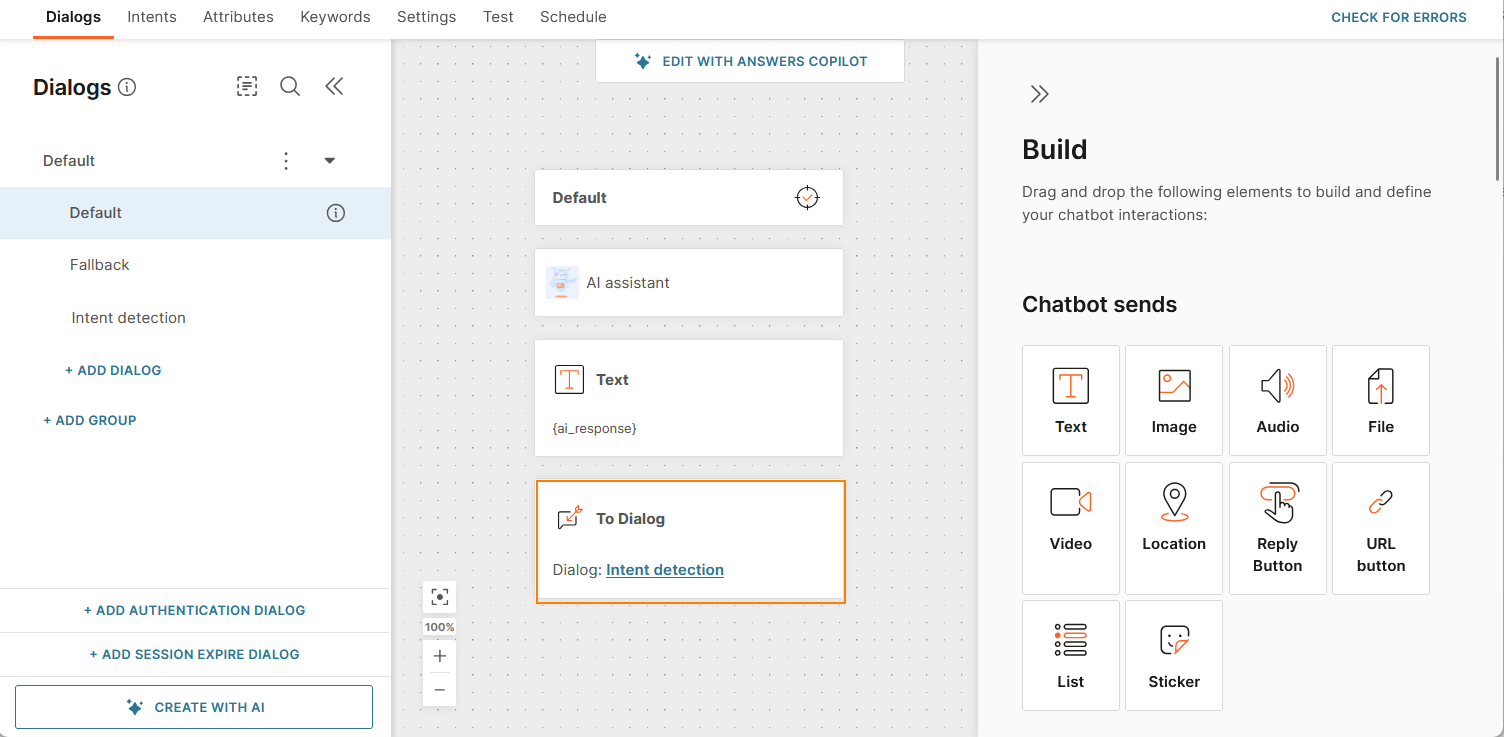
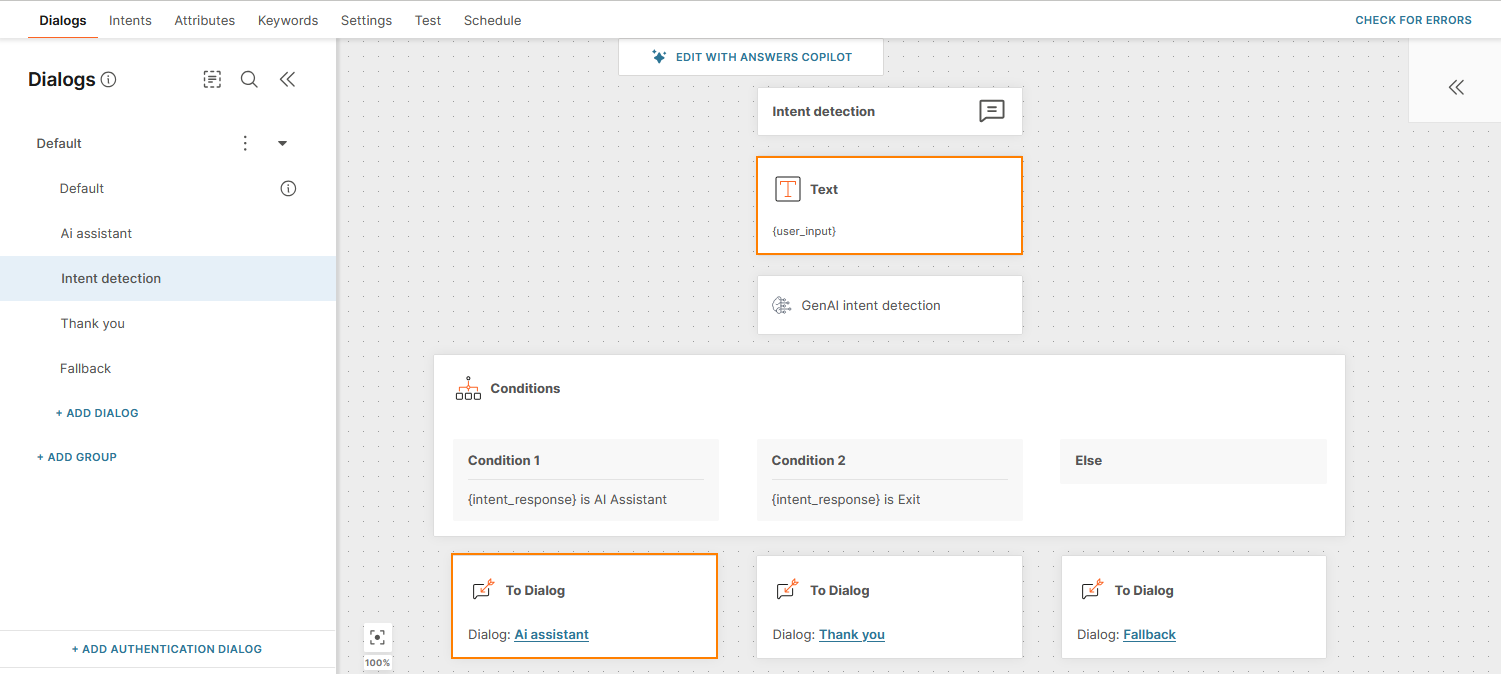
Then, in a different dialog, ask the end user for more input. Use the GenAI intent detection element to determine where to route the conversation. In the target dialog, you can define a way to route the conversation back to the AI assistant, resulting in a conversational AI experience.
Was this page helpful?