Import person data
Instead of manually creating each profile, you can import data for leads, customers, and companies using files or API.
In the Person page, select the Import button and choose how you want to upload your data:
- Start file import - Upload CSV, Excel, or text files with profile data
- View import history - Track completed imports and validation results
For programmatic import using APIs or integrating with external systems, see Create and synchronize person profiles.
Import rules
By default, leads are imported if the person type is not specified. You can specify a person type during import. Learn about the differences in person types.
- Lead profiles - If the profile does not exist, a lead or customer is created. If there is a duplicate profile, choose to make no changes or rewrite the current profile. The lead is updated; if the customer profile is being created, only empty fields are filled
- Customer profiles - If the profile does not exist, a lead or customer is created. If there is a duplicate profile, choose to make no changes or rewrite the current lead or customer profile. The lead profile is promoted to customer, and the customer profile is updated.
Prepare the import file
The file must follow these specifications:
| Specification | Requirements |
|---|---|
| Supported file format | .csv, .xls, .xlsx, .txt, or .zip |
| Maximum file size | 50 MB. For all file formats other than .zip files, if the file size exceeds the maximum, compress it into a .zip file. |
| Zip file | The .zip file should contain only 1 compressed file. If you add more than 1 file, only the first file is used to create the profiles, and the other files are ignored. |
| Contact information | The file must have at least 1 column for phone number, email, or external person ID mapping. |
| Maximum contacts | You can add a maximum of 100 contacts (phone numbers and email addresses) for a profile. If the limit is exceeded, the import fails. |
| Multiple contacts for the same profile | To import a profile that has multiple email addresses or phone numbers, use separate rows for each contact information. You can add a maximum of 20 additional contacts of either type. Records that exceed this limit are marked as invalid during the file analysis and skipped during import. |
If there are issues when importing .xlsx files that contain Kanji text, convert the file to either .xls or .csv format.
Start file import
To import the file, follow these steps:
- On the Infobip web interface, go to Persons → Import → Start file import.
- In the Manual import tab, select Upload file.
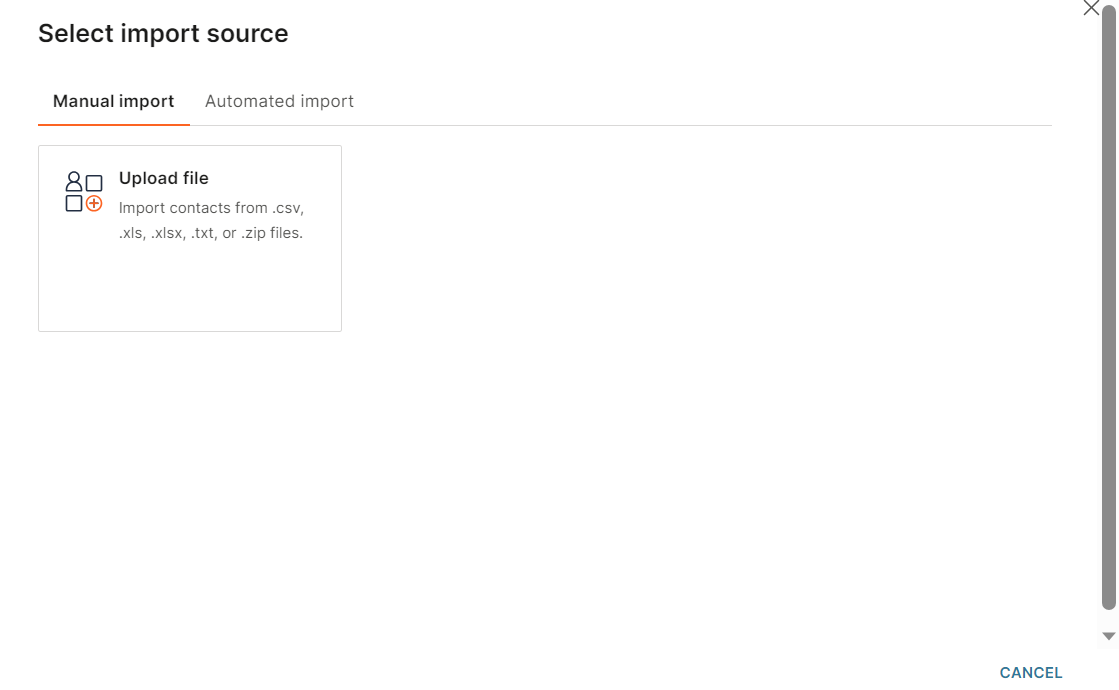
- Select a file from your system.
- Select Next.
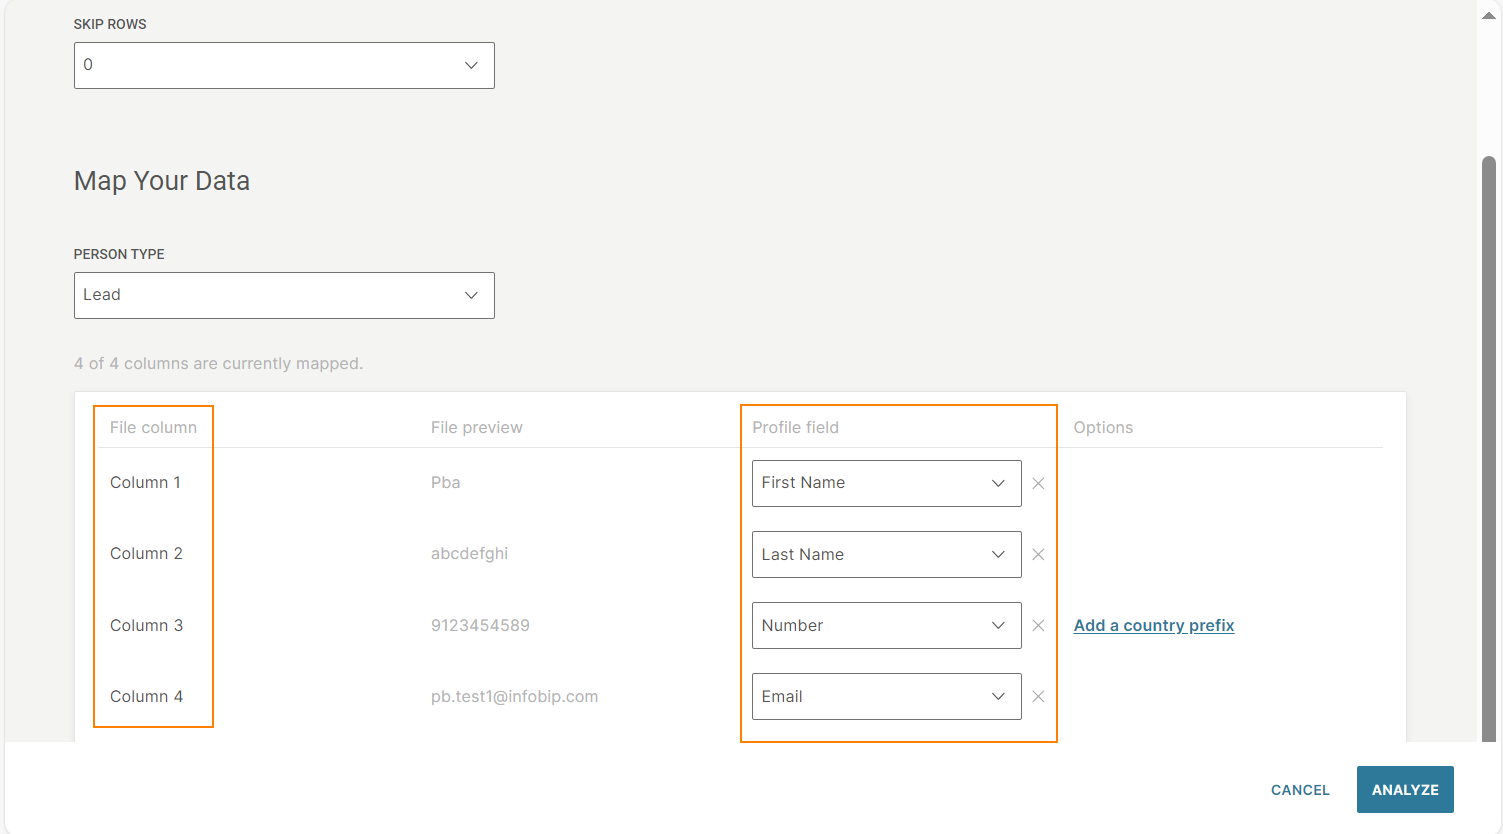
- (Optional) To skip a row, select the row number in the Skip rows field. The rows before the specified row are ignored during the import.
- In the Person type field, choose whether the profile is for a Customer or a Lead. This field is applied only to new profiles and not to existing profiles.
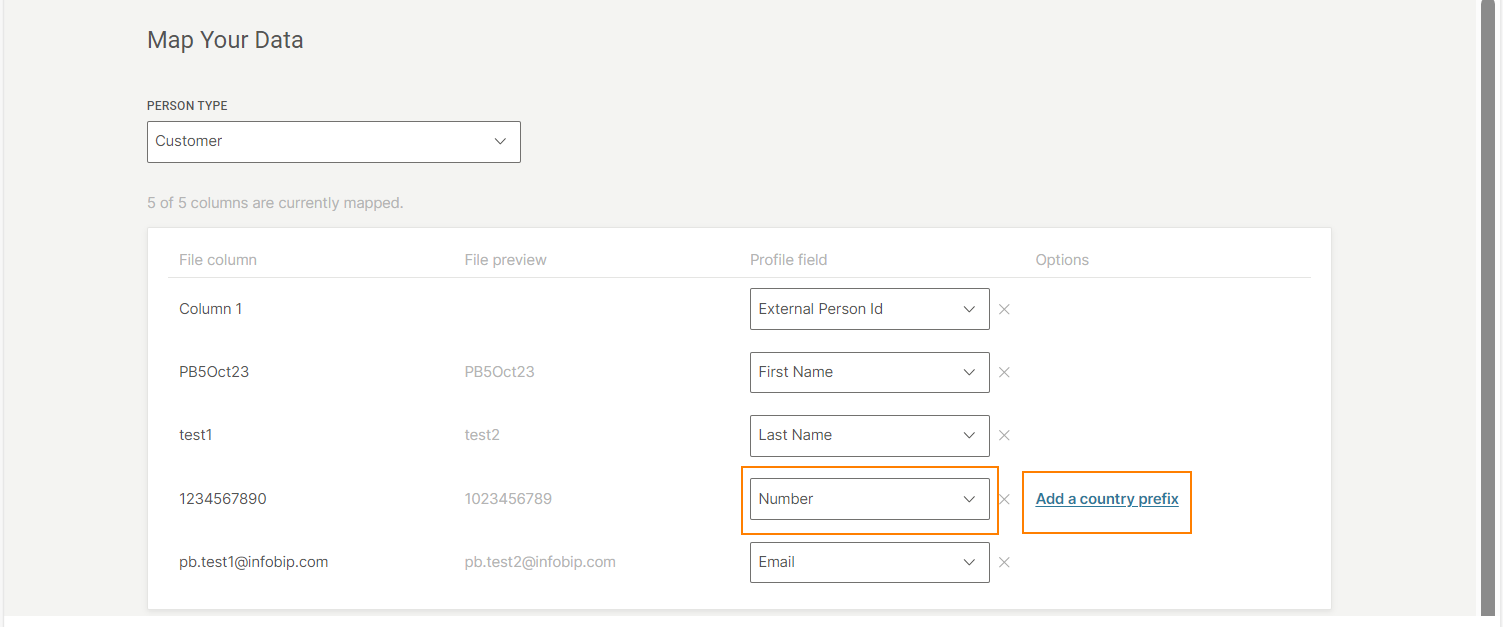
- In the Map your data section, map each column in the file to fields in Customer Profiles.
- For each column, choose the relevant Profile field.
Follow these guidelines:
- You must map at least 1 column as a number or external person ID. Otherwise, the data is not imported from your file.
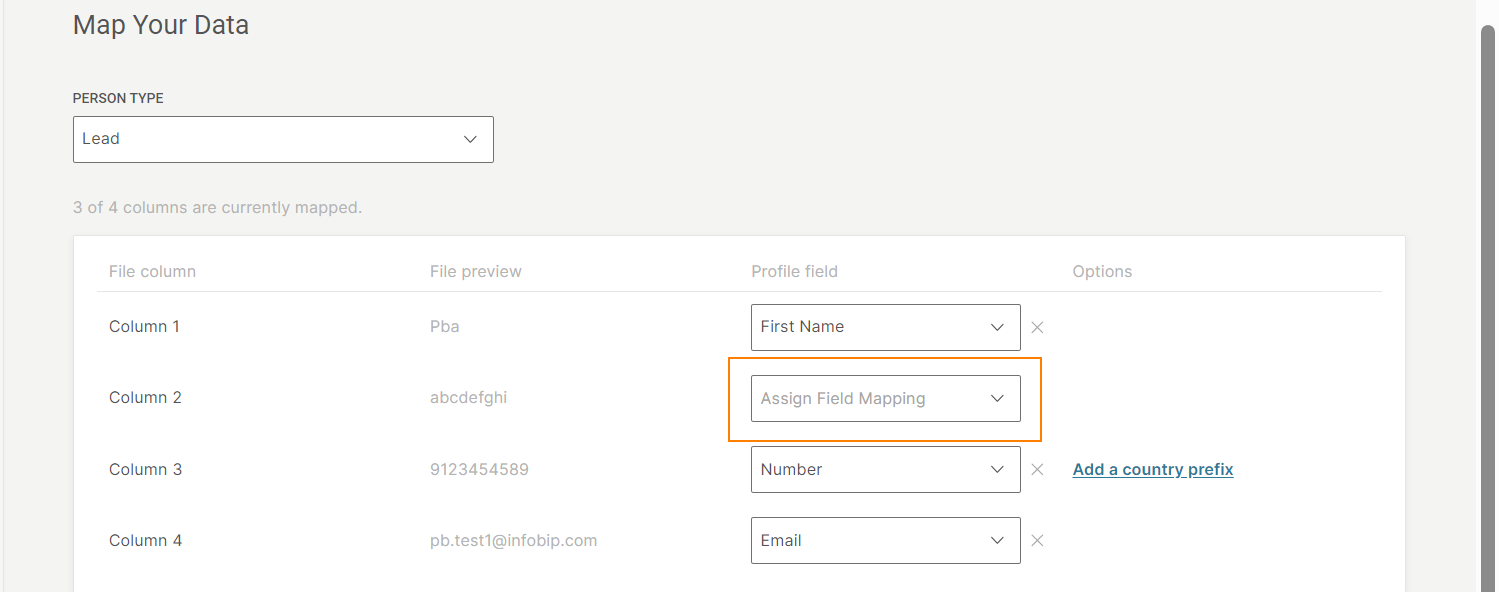
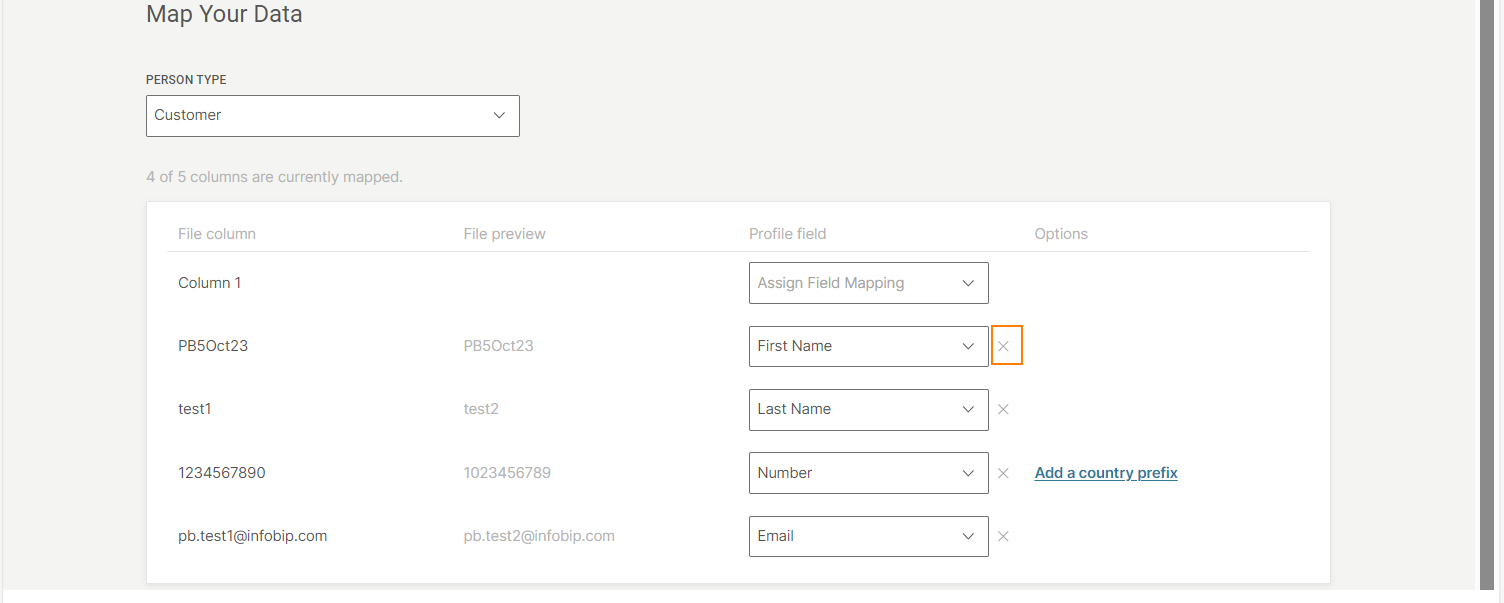
- You can map only 1 column to each profile field. If you map multiple columns to the same profile field, the most recent selection is saved.
- To skip a column in the file, do not choose an option in the Profile field. The system does not import these columns.
- (Optional) If you select Number in the Profile field, you can add the country prefix for the phone number. In the Options field, select Add a country prefix and choose the country from the list.
- To undo the mapping for a specific column, select the undo option.
- If you select Birth date in the Profile field, choose the date format from the list in the Options field.
- If you select Tags in the Profile field, choose the tag delimiter from the list in the Options field.
Then, do the following:
-
Select Analyze.
-
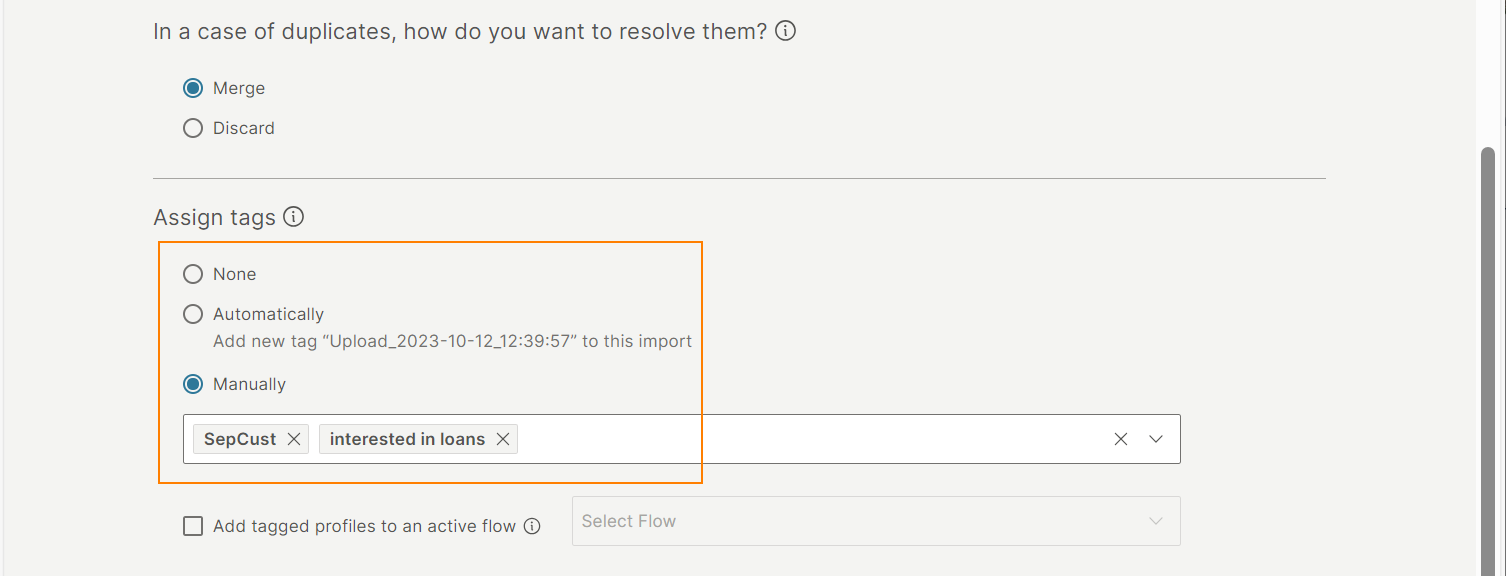
Select what to do when any records in the file contain one or more unique identifiers (email, phone number, or external ID) that match existing profiles in Customer Profiles:
- Discard: Do not import the records into Customer Profiles.
- Merge: Merge the records into the matching profile in Customer Profiles.
You cannot have more than 100 contacts (phone numbers and email addresses) for a single profile in Customer Profiles. If the limit is exceeded, the import fails.
-
Assign tags to track the profiles that were imported. Select one of the following options:
- None: Tags are not applied to the imported profiles.
- Automatically: A default system tag is applied to the imported profiles.
- Manually: Either create tags or select existing tags to apply to the imported profiles. You can add more than one tag.
-
To include the tagged profiles in an active Journey, enable Add tagged profiles to an active journey. Select the required Journey from the list. This field is applicable only if you assign tags either manually or automatically.

-
Select Import.
-
On the confirmation screen, select Import.
-
The import time depends on the amount of data in your file. You will receive a notification when the profiles are added to Customer Profiles.
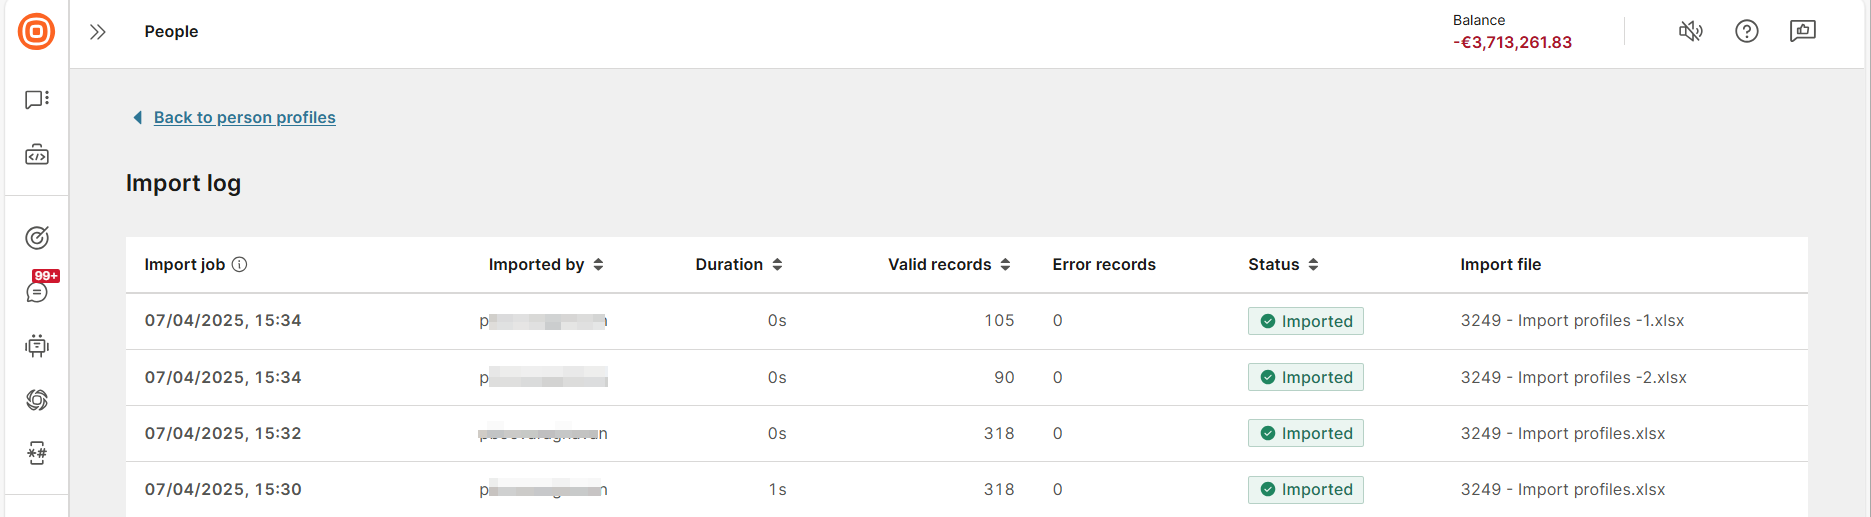
View import history
To view the details about the import:
- Select Import → View import history on the Persons page.
- You can view the following information:
- Import on: Timestamp indicating when the import was completed. Note: Import records are kept for 14 days. Only the 30 most recent imports are displayed.
- Imported by: Person who created the import.
- Duration: Time taken to complete the import.
- Valid records: Number of records that were successfully imported.
- Error records: Number of records that contained errors and were not imported.
- Status: Status of the import.
- Import file: The file that was imported.
- Import details: Select the View button to see the import details.