Send your first Voice message
To use Voice on the Infobip platform, you need to meet the following requirements:
- Create an Infobip account (if you do not already have one) by completing the platform onboarding.
- Register your number
Start your free trial
Once you create your Infobip account, your free trial starts and will remain active for 60 days.
Your 60-day free trial begins on the day your account is created. A countdown will display the number of days remaining in your trial.
Limitations
Here are some specific details for Voice and WebRTC to keep in mind during the free trial:
- You are entitled to:
- 15 outgoing calls or voice messages to a phone.
- 15 incoming calls from a phone
- You can test 100 video or audio online calls over Web Real-Time Communications (WebRTC).
- Voice calls in the trial period can only be directed to a mobile phone number you verified during the signup process.
- Voice calls in the trial period are limited to a 5-minute duration.
Sign up and trial users are limited to the countries specified in the list below. If you are interested in any country not specified in this list, contact Sales.
Available countries for Voice calls [#available-countries-for-voice-calls-start-your-free-trial]
Available countries for outbound calls
- Afghanistan
- Albania
- Algeria
- Angola
- Argentina
- Armenia
- Australia
- Austria
- Azerbaijan
- Bahrain
- Bangladesh
- Belarus
- Belgium
- Benin
- Bosnia and Herzegovina
- Brazil
- Bulgaria
- Burkina Faso
- Cameroon
- Canada
- Central African Republic
- Chad
- Chile
- Colombia
- Comoros
- Congo
- Cote d'Ivoire
- Cyprus
- Croatia
- Denmark
- Ecuador
- Egypt
- El Salvador
- Estonia
- Eswatini
- Ethiopia
- Finland
- France
- Gabon
- Georgia
- Germany
- Ghana
- Guatemala
- Guinea
- Honduras
- Hong Kong
- Hungary
- India
- Indonesia
- Iran
- Iraq
- Ireland
- Israel
- Italy
- Japan
- Jersey
- Jordan
- Kazakhstan
- Kenya
- Kosovo
- Kuwait
- Kyrgyzstan
- Lao People's Democratic Republic
- Libya
- Luxembourg
- Macao
- Malaysia
- Mali
- Mauritius
- Mexico
- Moldova
- Montenegro
- Morocco
- Mozambique
- Myanmar
- Namibia
- Netherlands
- Nigeria
- Norway
- Oman
- Pakistan
- Panama
- Paraguay
- Peru
- Philippines
- Poland
- Portugal
- Puerto Rico
- Qatar
- Romania
- Russian Federation
- Saudi Arabia
- Senegal
- Serbia
- Singapore
- Slovakia
- Slovenia
- South Africa
- Spain
- Sweden
- Switzerland
- Taiwan
- Tajikistan
- Tanzania
- Thailand
- Tunisia
- Turkey
- Uganda
- Ukraine
- United Arab Emirates
- United Kingdom
- Uzbekistan
- Vanuatu
- Venezuela
- Vietnam
- Yemen
- Zambia
- Zimbabwe
- USA (can only be enabled after contacting Support)
Available countries for inbound calls
- Argentina
- Australia
- Brazil
- Canada
- Chile
- Cocos (Keeling) Island
- Costa Rica
- Croatia
- Czech Republic
- Denmark
- Ecuador
- Estonia
- Germany
- Guatemala
- Hong Kong
- Jersey
- Kazakhstan
- Lithuania
- Malaysia
- Mexico
- Palau
- Panama
- Peru
- Philippines
- Puerto Rico
- Romania
- Singapore
- South Africa
- Sweden
- Taiwan
- Thailand
- Ukraine
- United Kingdom
- Vietnam
- USA (can only be enabled after contacting Support)
Upgrade to a paying account [#upgrade-to-a-paying-account-start-your-free-trial]
You can upgrade to a paying account at any time. Select the Add funds option at the top of the page and choose a billing option. Once you add funds to your account balance, it will no longer be in the free trial mode.
If your free trial has ended, a banner will appear at the top of your homepage. You can add funds by selecting the Upgrade now button and continue sending messages to your customers.
Start using Voice and WebRTC
Once you have registered for an Infobip account and have started your free trial, you can send your first Voice message.
- Start sending voice messages with Voice on the web interface. At the top of the page, select whether you are a business user or a developer:
- Business users can test messages directly in the web interface.
- Developers can send test messages using the ready-made API request.
- Send your first Voice message. The recipient field is prepopulated with the number you verified during sign-up. During the free trial, you can add up to five recipients with verified numbers.
Business user experience
Business users can test messages directly in the web interface.
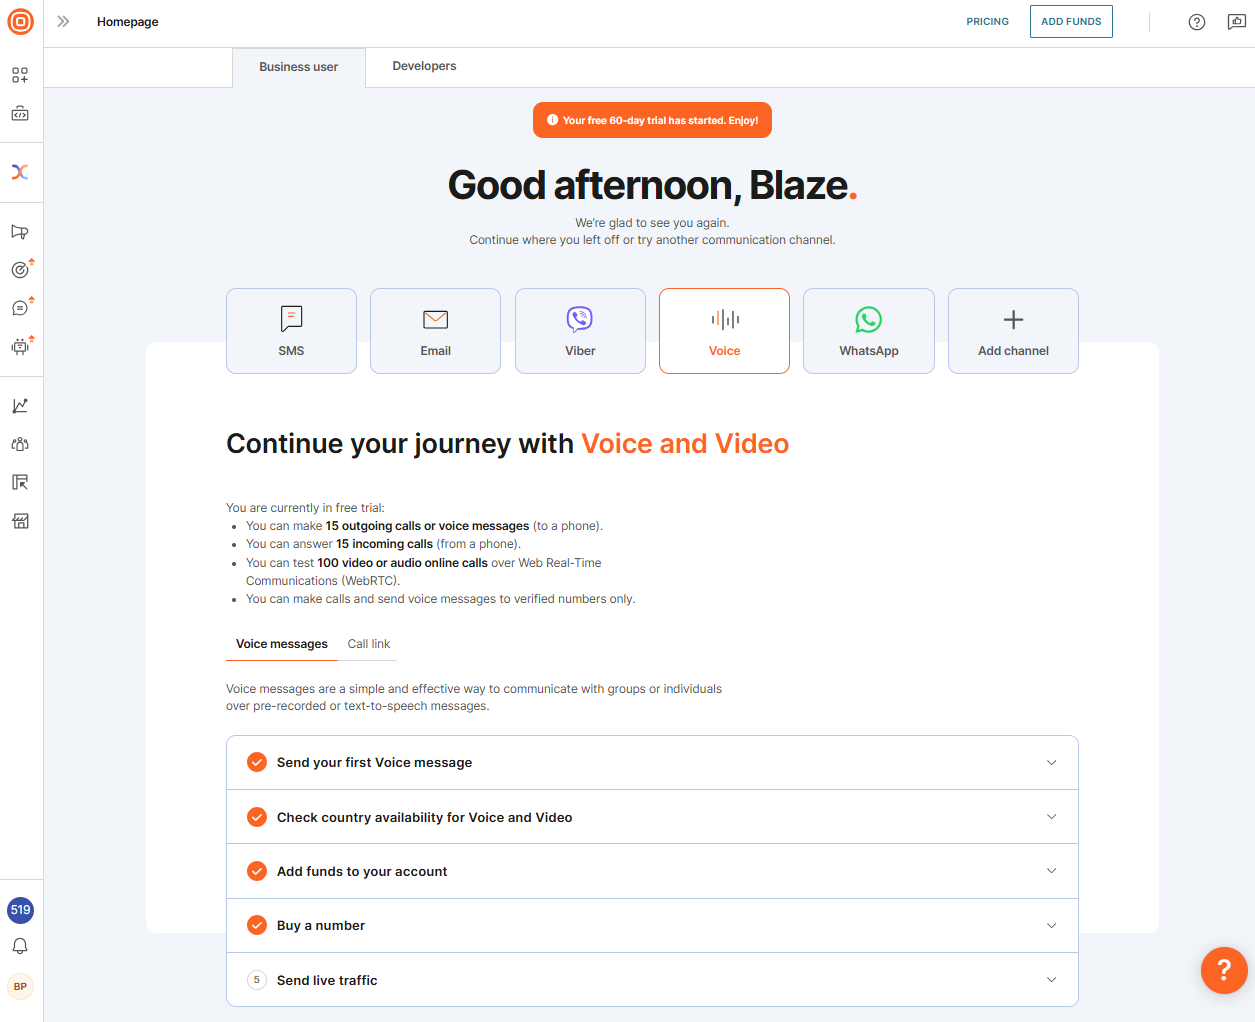
To send your first message as a business user, follow these steps:
- Send your first message and enter the recipients, add their name and verify their number.
- Text to speech: Type the message that you want to be converted to an audio message to your clients and customers.
- Language: Select the language you want to use, as well as the voice and speed at which the "agent" will speak.
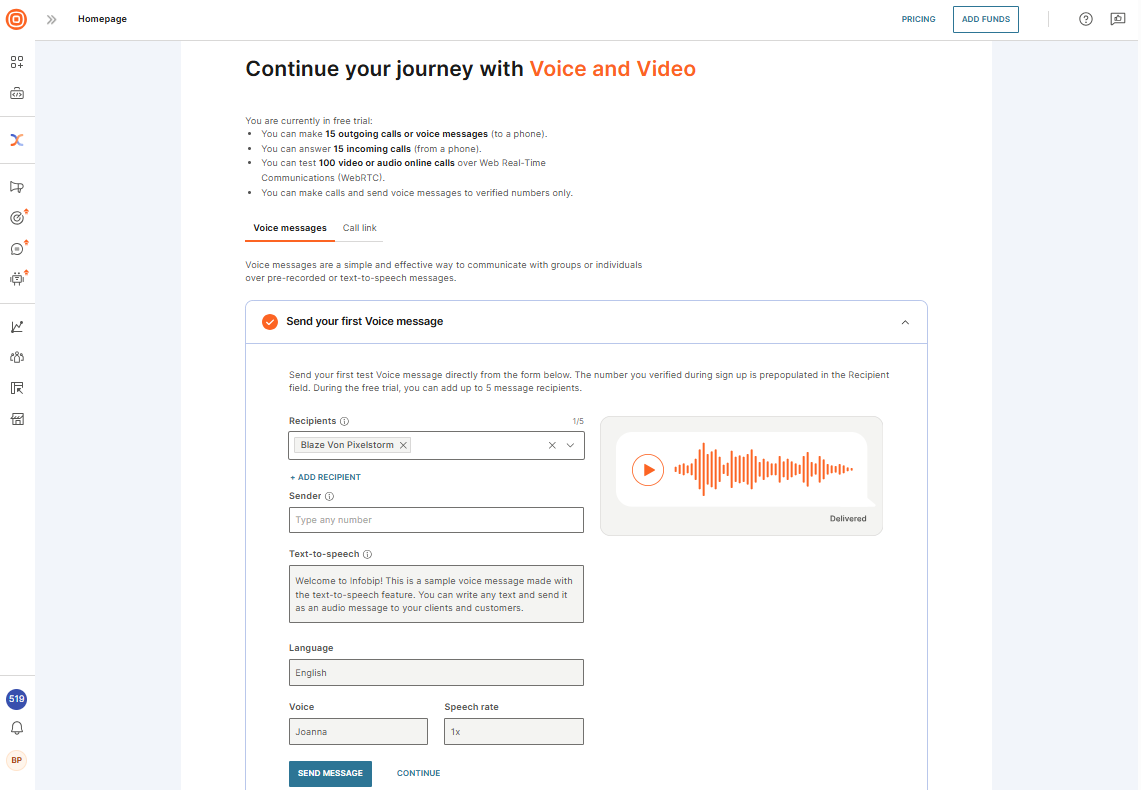
- Check the country availability. You can make voice and video calls globally during the free trial.
- (Optional) Add funds to your account to stay connected after the free trial ends. With the Infobip straightforward pay-as-you-go system, you only pay for the Voice messages you send.
- Buy a number and receive calls from your clients. You can also have a specific number displayed as your caller ID when you start sending live traffic. Numbers come with both a monthly fee and a one-time setup fee.
You are now ready to start sending live traffic with Voice.
Voice and video calls can be made globally during the free trial. After the free trial ends some countries may change availability for voice and video calls.
Call Link
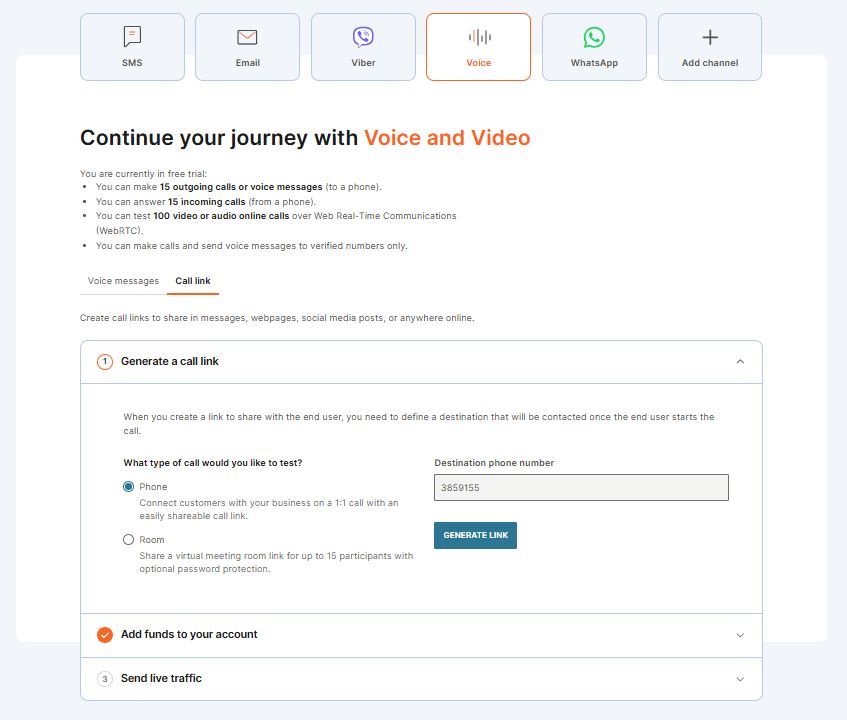
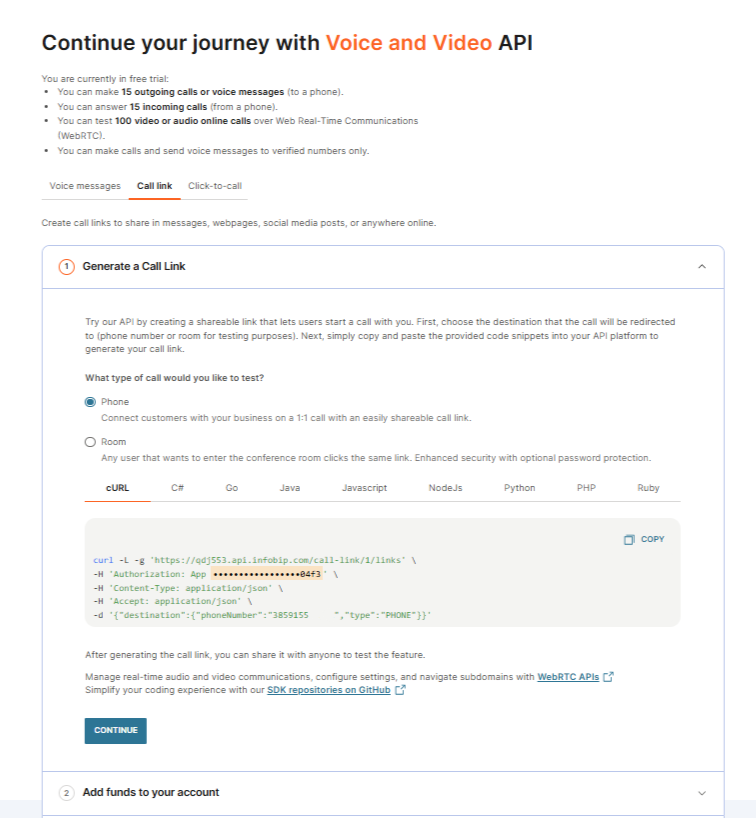
Generate a Call Link to create a shareable link for a phone call or a conference room.
You can choose to create two types of Call Links:
- Phone: Connect customers with your business on a 1:1 call with a shareable link.
- Room: Create a conference room call for up to 15 participants. You can secure the room with optional password protections.
You can add funds to your account and start sending live traffic.
Developer experience
If you decide to send Voice messages using the ready-made API request, you have three options available:
- Voice messages
- Call Links
- Click-to-call
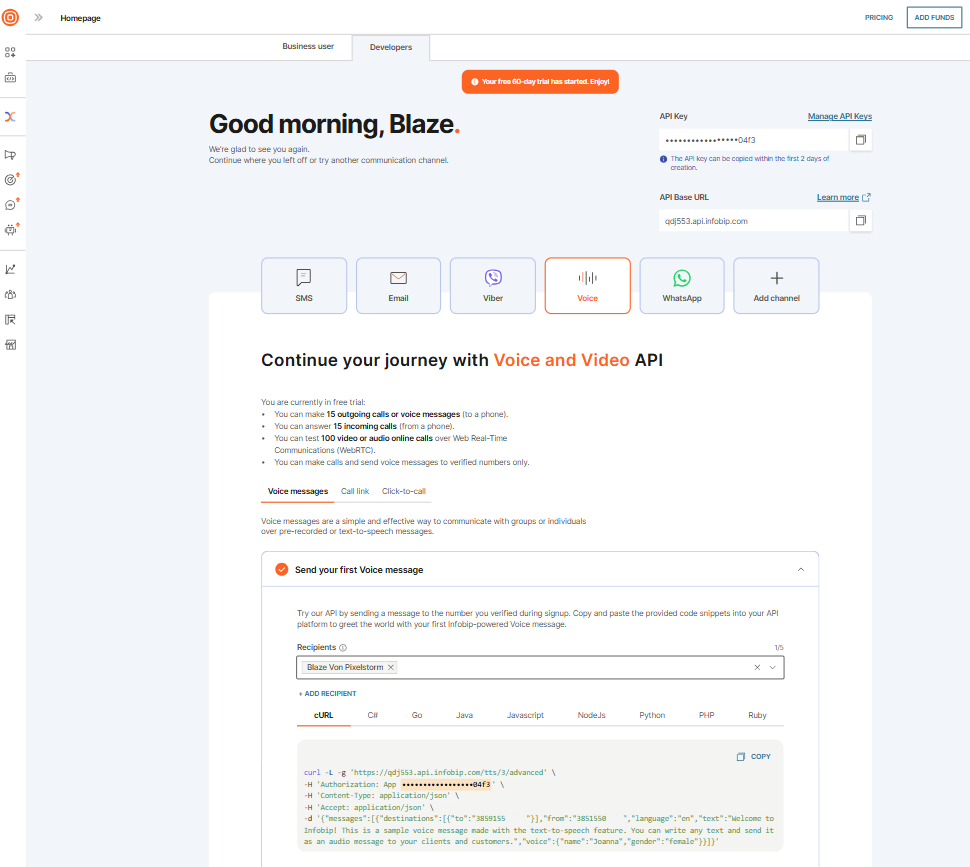
- Copy and paste the provided code snippet from the web interface into your API platform.
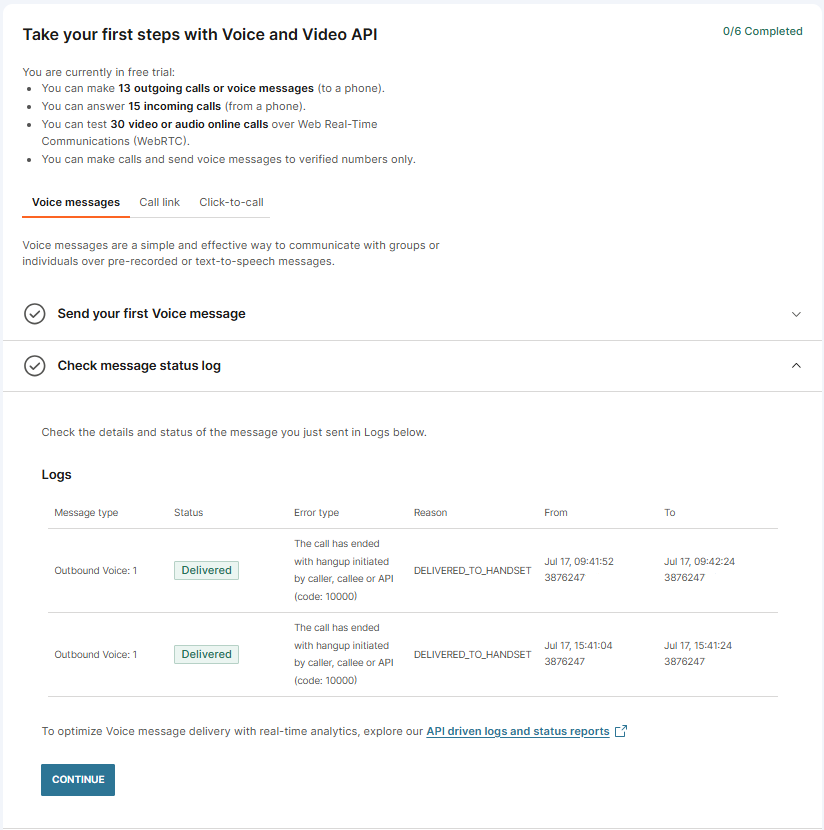
- Check the message status log to confirm successful delivery. If delivery fails, review the response status and error codes to identify the issue.
-
Check country availability. You can make voice and video calls globally during the free trial. After the trial ends, some countries may change availability for voice and video calls.
-
(Optional) Add funds to your account
- To upgrade your account now, select Add funds and follow the steps to become a paying account.
- To upgrade your account at a later time:
- If your free trial is still active, select Add funds at the top of the web interface.
- If your trial has expired, a banner will appear on your homepage. Select Upgrade now to add funds.
-
Buy a number
-
Once completing these steps, you are ready to send voice live traffic.
Call Link through the API
Create a shareable link that lets users start a call with you, using the Infobip API.
You can create two types of Call Links:
-
Phone: Share a link that lets customers connect with your business through a one-on-one call.
-
Room: Set up a conference call for up to 15 participants, with the option to add password protection for extra security.
- Copy and paste the code snippets into your API platform to generate your Call Link.
- Once generating your Call Link, you can share it with anyone and test the feature.
Click-to-call
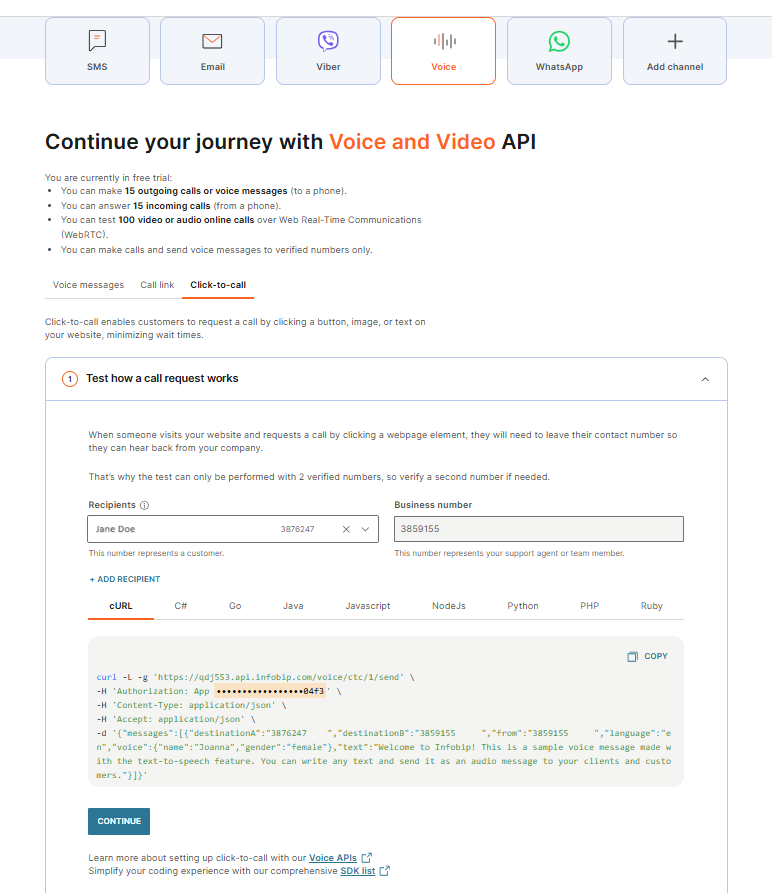
Use click-to-call to enable your customers to request a call by selecting a button, image, or on text on your website and minimize waiting times.
To start with Click-to-call-testing, follow the following steps:
- Test how a call request works: This test can only be performed with 2 verified numbers. Verify a second number if needed before testing.
When a user visits your website and requests a call by clicking a webpage element, they will need to leave their contact number so they can hear back from your company.
- After testing a call request, you can check the call status in logs. If delivery fails, review the response status and error codes to identify the issue.
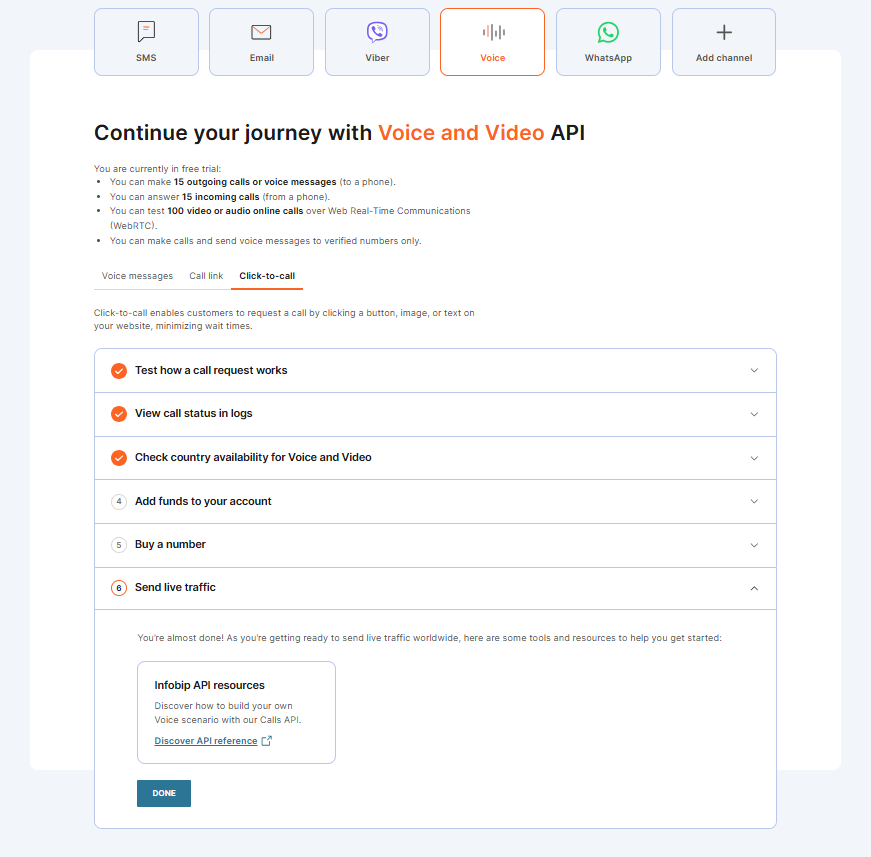
Once these steps are complete, you are ready to send voice live traffic!
Numbers and senders
For each Infobip voice solution, you can select a phone number to be used as the caller ID. This caller ID may or may not be displayed as-is on the end-user phone depending on the voice connection used to reach the destination. If you need to ensure your caller ID is always displayed, reach out to the Support team.
To process inbound calls with Infobip voice solutions, you need to use Infobip voice numbers, unless your inbound calls will reach the Infobip platform over SIP or webRTC. You can lease voice numbers from Infobip and set up the desired voice action on these at any time.
See Voice Numbers for more details.