Communicate with customers
This guide covers how to send messages, share rich media content, make calls, and use templates to communicate effectively with customers across multiple channels.
Send messages
Inbox support more than one channel so the agent can choose which channel to use to reply to the customer. If the customer has more than one channel or more numbers per channel associated, the agent will have all the numbers available within the drop-down menu.
By default, the last channel used within the conversation will be pre-selected.
To send your message, type the message content and click Send message. To write an internal note, click Internal in the bottom right corner.
Agents can see the following info for sent messages:
- Delivered status for agent messages is now available for all channels
- Seen status is available for chat apps and Live Chat
- Rules made by customer apply here as well (hide when I read)
Send rich media
Customers can send rich media (depending on channel-specific policies) and it will be rendered in a way that agents can read it.
Supported rich media include:
- Images
- Files
- Video
- Audio
- Location
Messaging window supports different message formats depending on the channel capabilities:
| SMS | Viber | Messenger | ||
|---|---|---|---|---|
| Emoji | YES | YES | YES | YES |
| Bold | NO | NO | YES | NO |
| Italic | NO | NO | YES | NO |
| Underlined | NO | NO | NO | NO |
| Location | NO | YES | YES | YES |
| Sending media files | NO | YES | YES | YES |
Media files [#media-files-send-rich-media]
Supported media file formats and maximum size (note that these are related to WhatsApp; other channels have different specifications):
| Media type | Size | File format |
|---|---|---|
| Image | 5 MB | JPG, JPEG, PNG |
| Audio | 16 MB | AAC, M4A, AMR, MP3, OGG, OPUS |
| Video | 16 MB | MP4, 3GPP |
| Document | 50 MB | PDF, DOC(X), PPT(X), XLS(X) |
To learn more about other channels' specifications, go here, find the appropriate channel in the Communication Channels section, and look for the message types descriptions.
Message length by channel [#message-length-by-channel-send-rich-media]
Supported message length depends on the channel and the values are listed below:
| Channel | Characters | Comment |
|---|---|---|
| SMS | 160 | More than 160 characters is possible but the message will be charged as two (or more) separate messages (depending on how many times 160 characters are used). |
| 3000 | ||
| Viber | 1000 | |
| Viber Bot | 1000 | |
| Messenger | 2000 | |
| LINE | 5000 | |
| Live Chat | 4096 | |
| 1000 | ||
| Telegram | 1000 | |
| RCS | 1000 | |
| Kakao Sangdam | 1000 | |
| Apple Messages for Business | 1000 |
Share location [#share-location-send-rich-media]
To share a location:
- Select the Location icon.
- Type in the name of the location.
- Select the Share location button to send.
Share voice message [#share-voice-message-send-rich-media]
This feature is only available for the WhatsApp channel.
This feature enables you to convey information, instructions, or personal messages through spoken words instead of text.
You can record and share an audio message using your device microphone while communicating with customers over the WhatsApp channel.
To record a voice message:
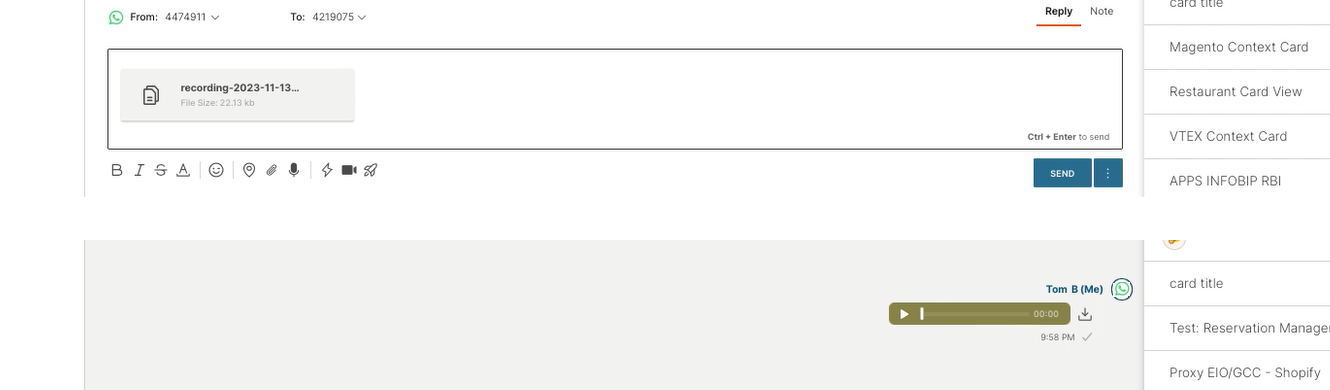
- Select the Record voice message microphone icon displayed within the chat options.

- Upon selecting the option, you will be prompted to allow access to your device microphone. If multiple options are available for devices, you will need to specify which device you are granting access to for recording.
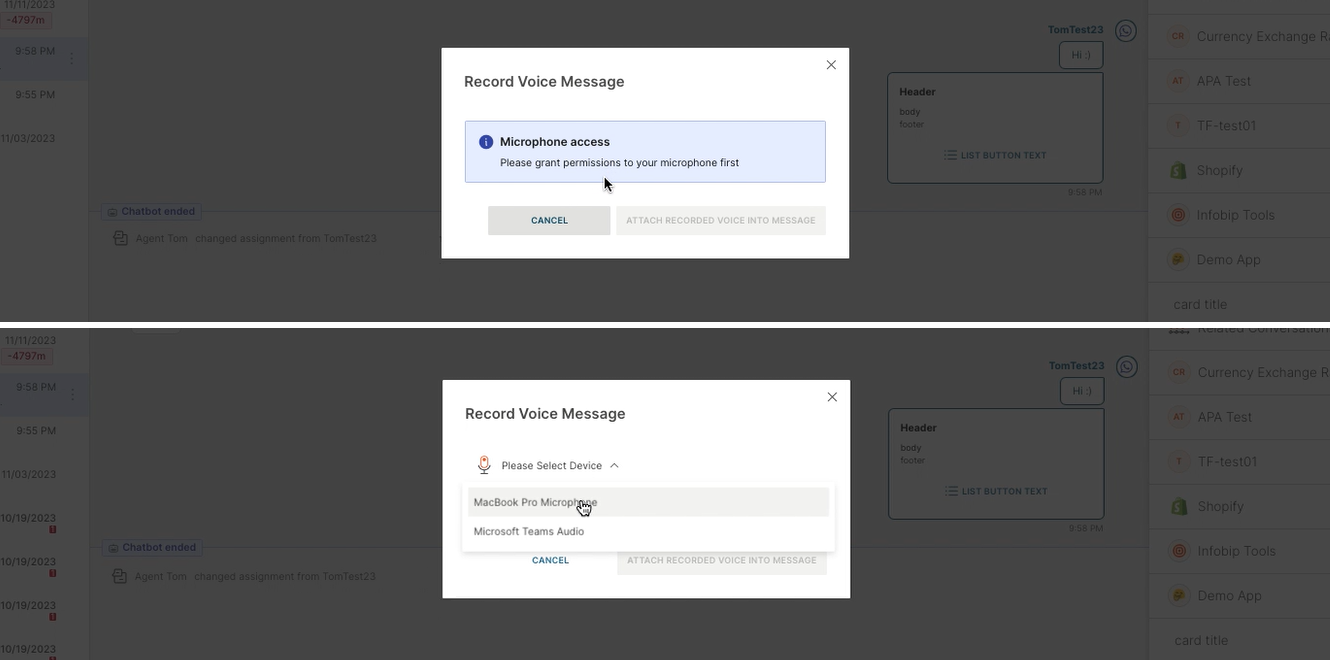
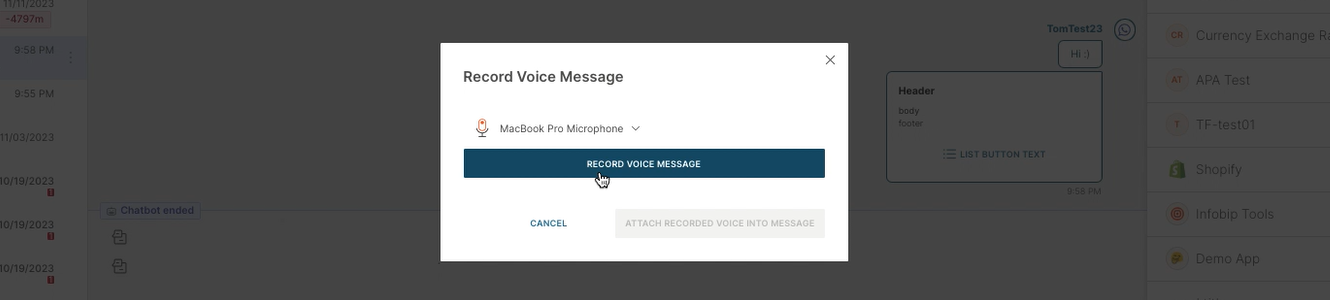
- Once you grant the access, select the Record voice message button to start recording your message.
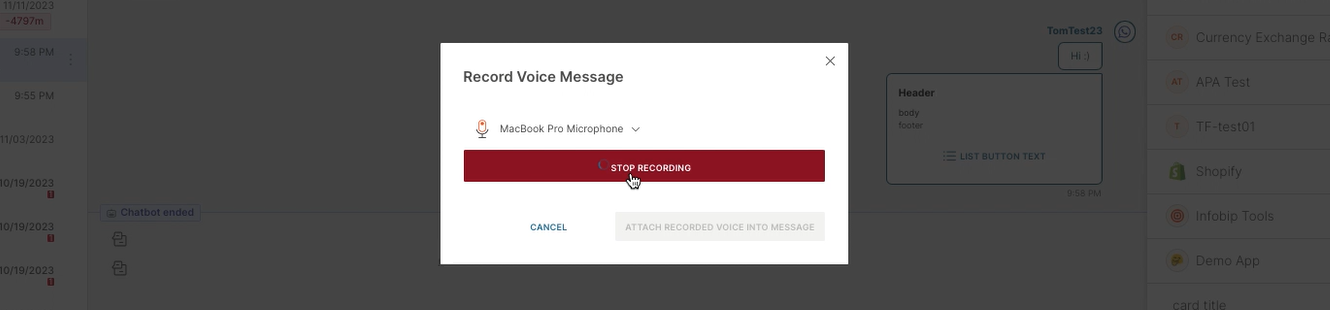
- When finished, select the Stop recording button to end the recording.
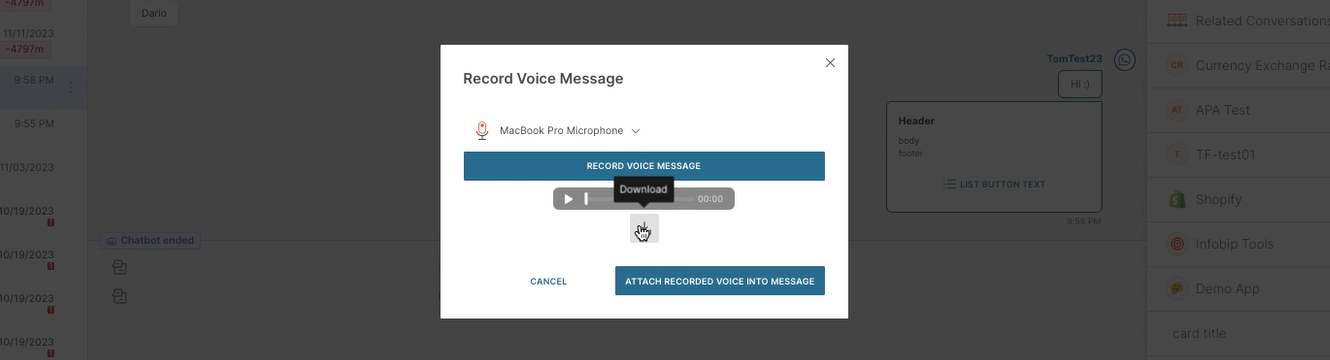
- Before you send the recording, you can listen to it and download the file by clicking the respective buttons.
- If you are satisfied with your recording, select the Attach recorded voice into message button to attach it to the chat box.
- If you need to record your voice message again, select the Record voice message button which will replace the previous recording with the new one, or Cancel, and start recording again by clicking the microphone button in the chat options.
- Attach the recorded message and click Send. The audio file will be displayed in the chat box, allowing the customer to listen to the recorded message.
Delete files from a conversation
Deleting attachments in the Email channel is not supported yet.
Deleting files promptly removes sensitive information, minimizing the risk of data breaches and ensuring compliance with privacy regulations.
Agents assigned to specific conversations and supervisors overseeing multiple conversations can delete files from the outbound conversation content only. This means you can remove files that were sent to the user, but not those received from the user.
The link becomes invalid once the associated file is deleted.
To delete a file from a conversation:
- Select the Delete icon 🗑️.
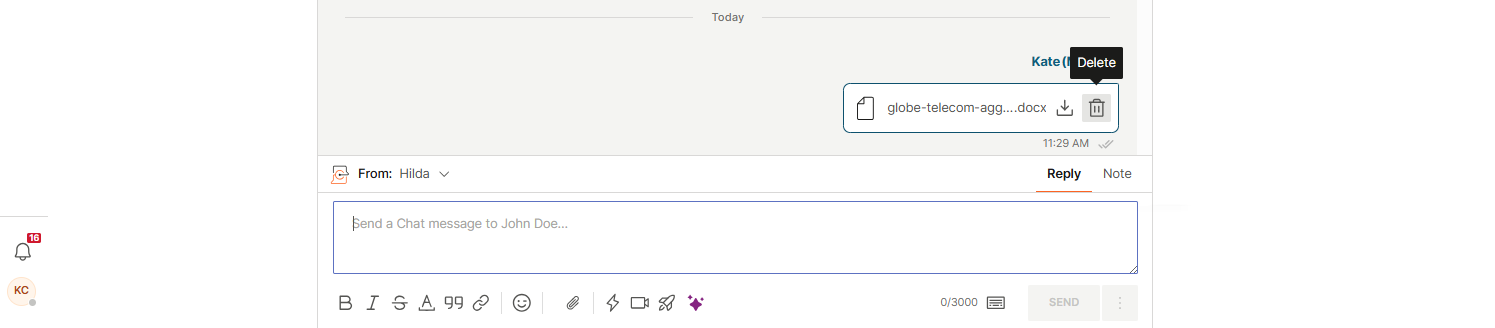
- A confirmation pop-up will appear.
- Select Delete to proceed or Cancel if you change your mind.
- Once the file is deleted, a green notification will appear in the lower-left corner. The file is deleted from the Infobip side, however, if it has already been downloaded by the end customer or certain channel infrastructures, we cannot retroactively remove or update it. For example, WhatsApp downloads files to its storage. In such cases, even after deletion on our side, the file remains accessible to the customer within WhatsApp.
Calls
For detailed information about making and managing calls in Inbox, refer to the Calls in Inbox documentation.
You can initiate calls directly from conversations and manage call features such as:
- Making outbound calls
- Receiving incoming calls
- Transferring calls to other agents or queues
- Call on hold
- Consult call
- Warm call transfer
- Group call
- Generate call link
- Screen sharing
- Callback
- Call wrap-up window
- Call recordings
Conversation templates
Use a template
You can quickly select a template in the message content box by typing /, which opens a pop-up for template selection.
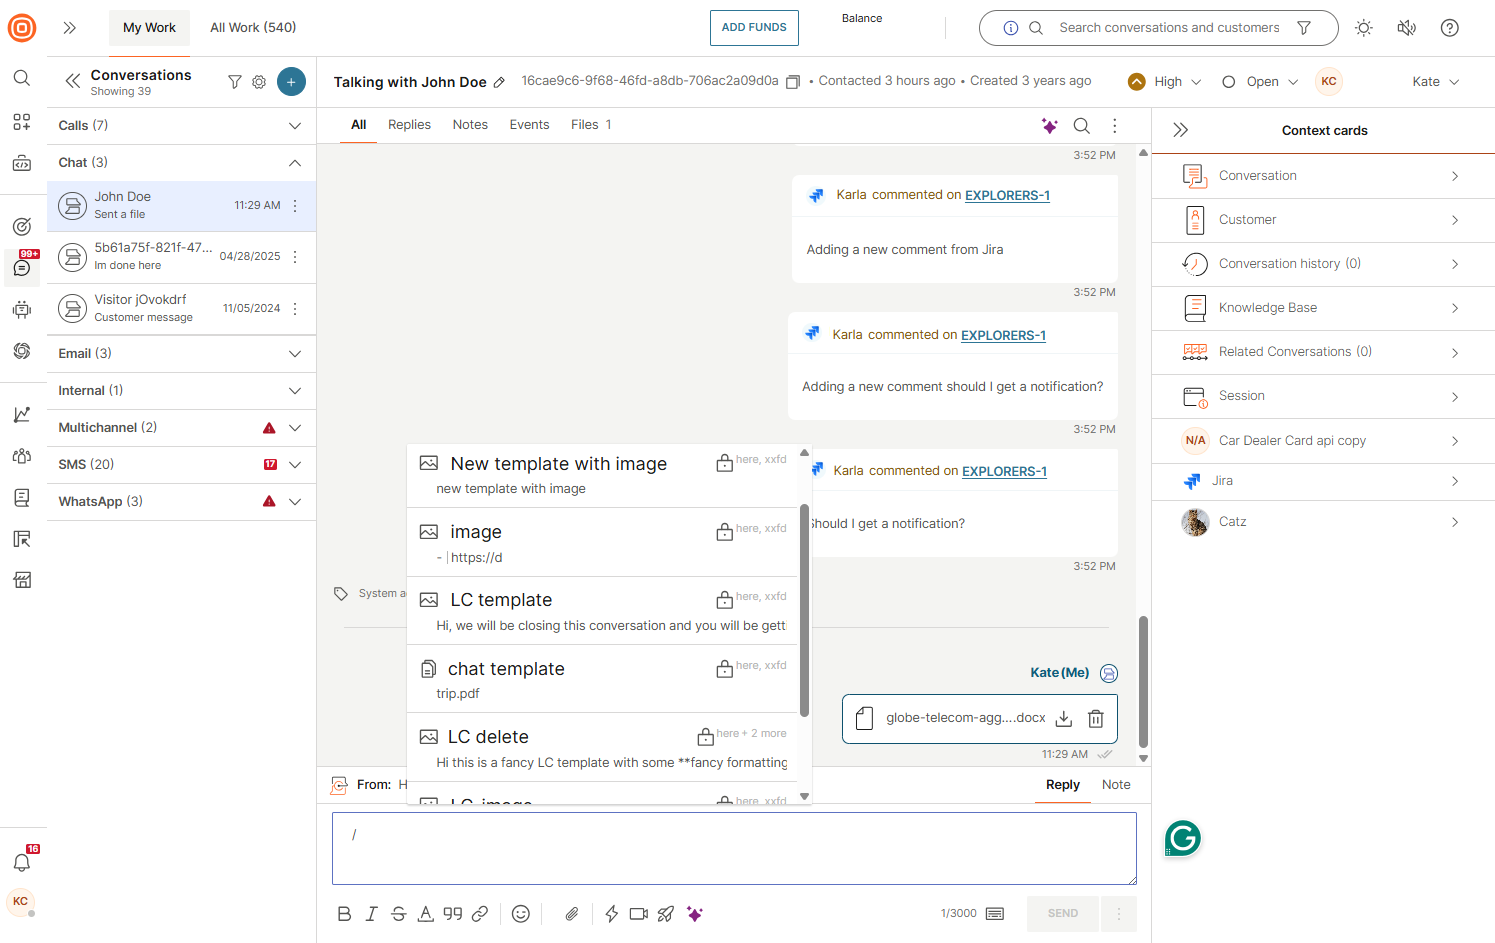
Another way to access templates is by:
- Selecting the template icon at the bottom of the messages content box:

- The templates pop-up opens, allowing you to search for and select a specific template, or narrow the list using the Tag and Language filters.
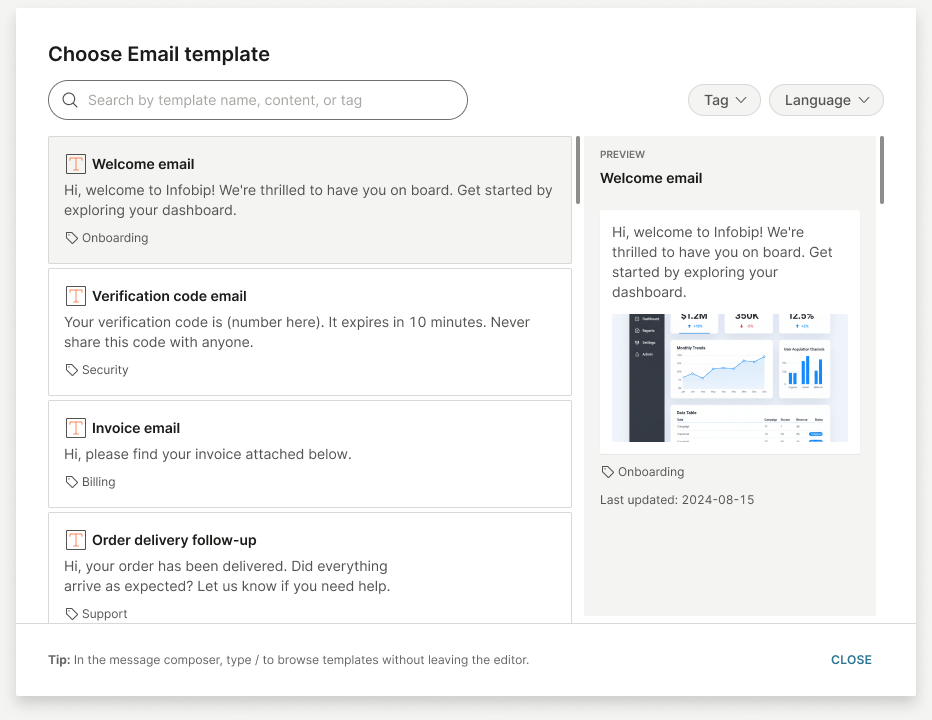
- Selecting a template shows a preview of its rendered content, including any attachments, rendered as a full email preview for the Email channel.
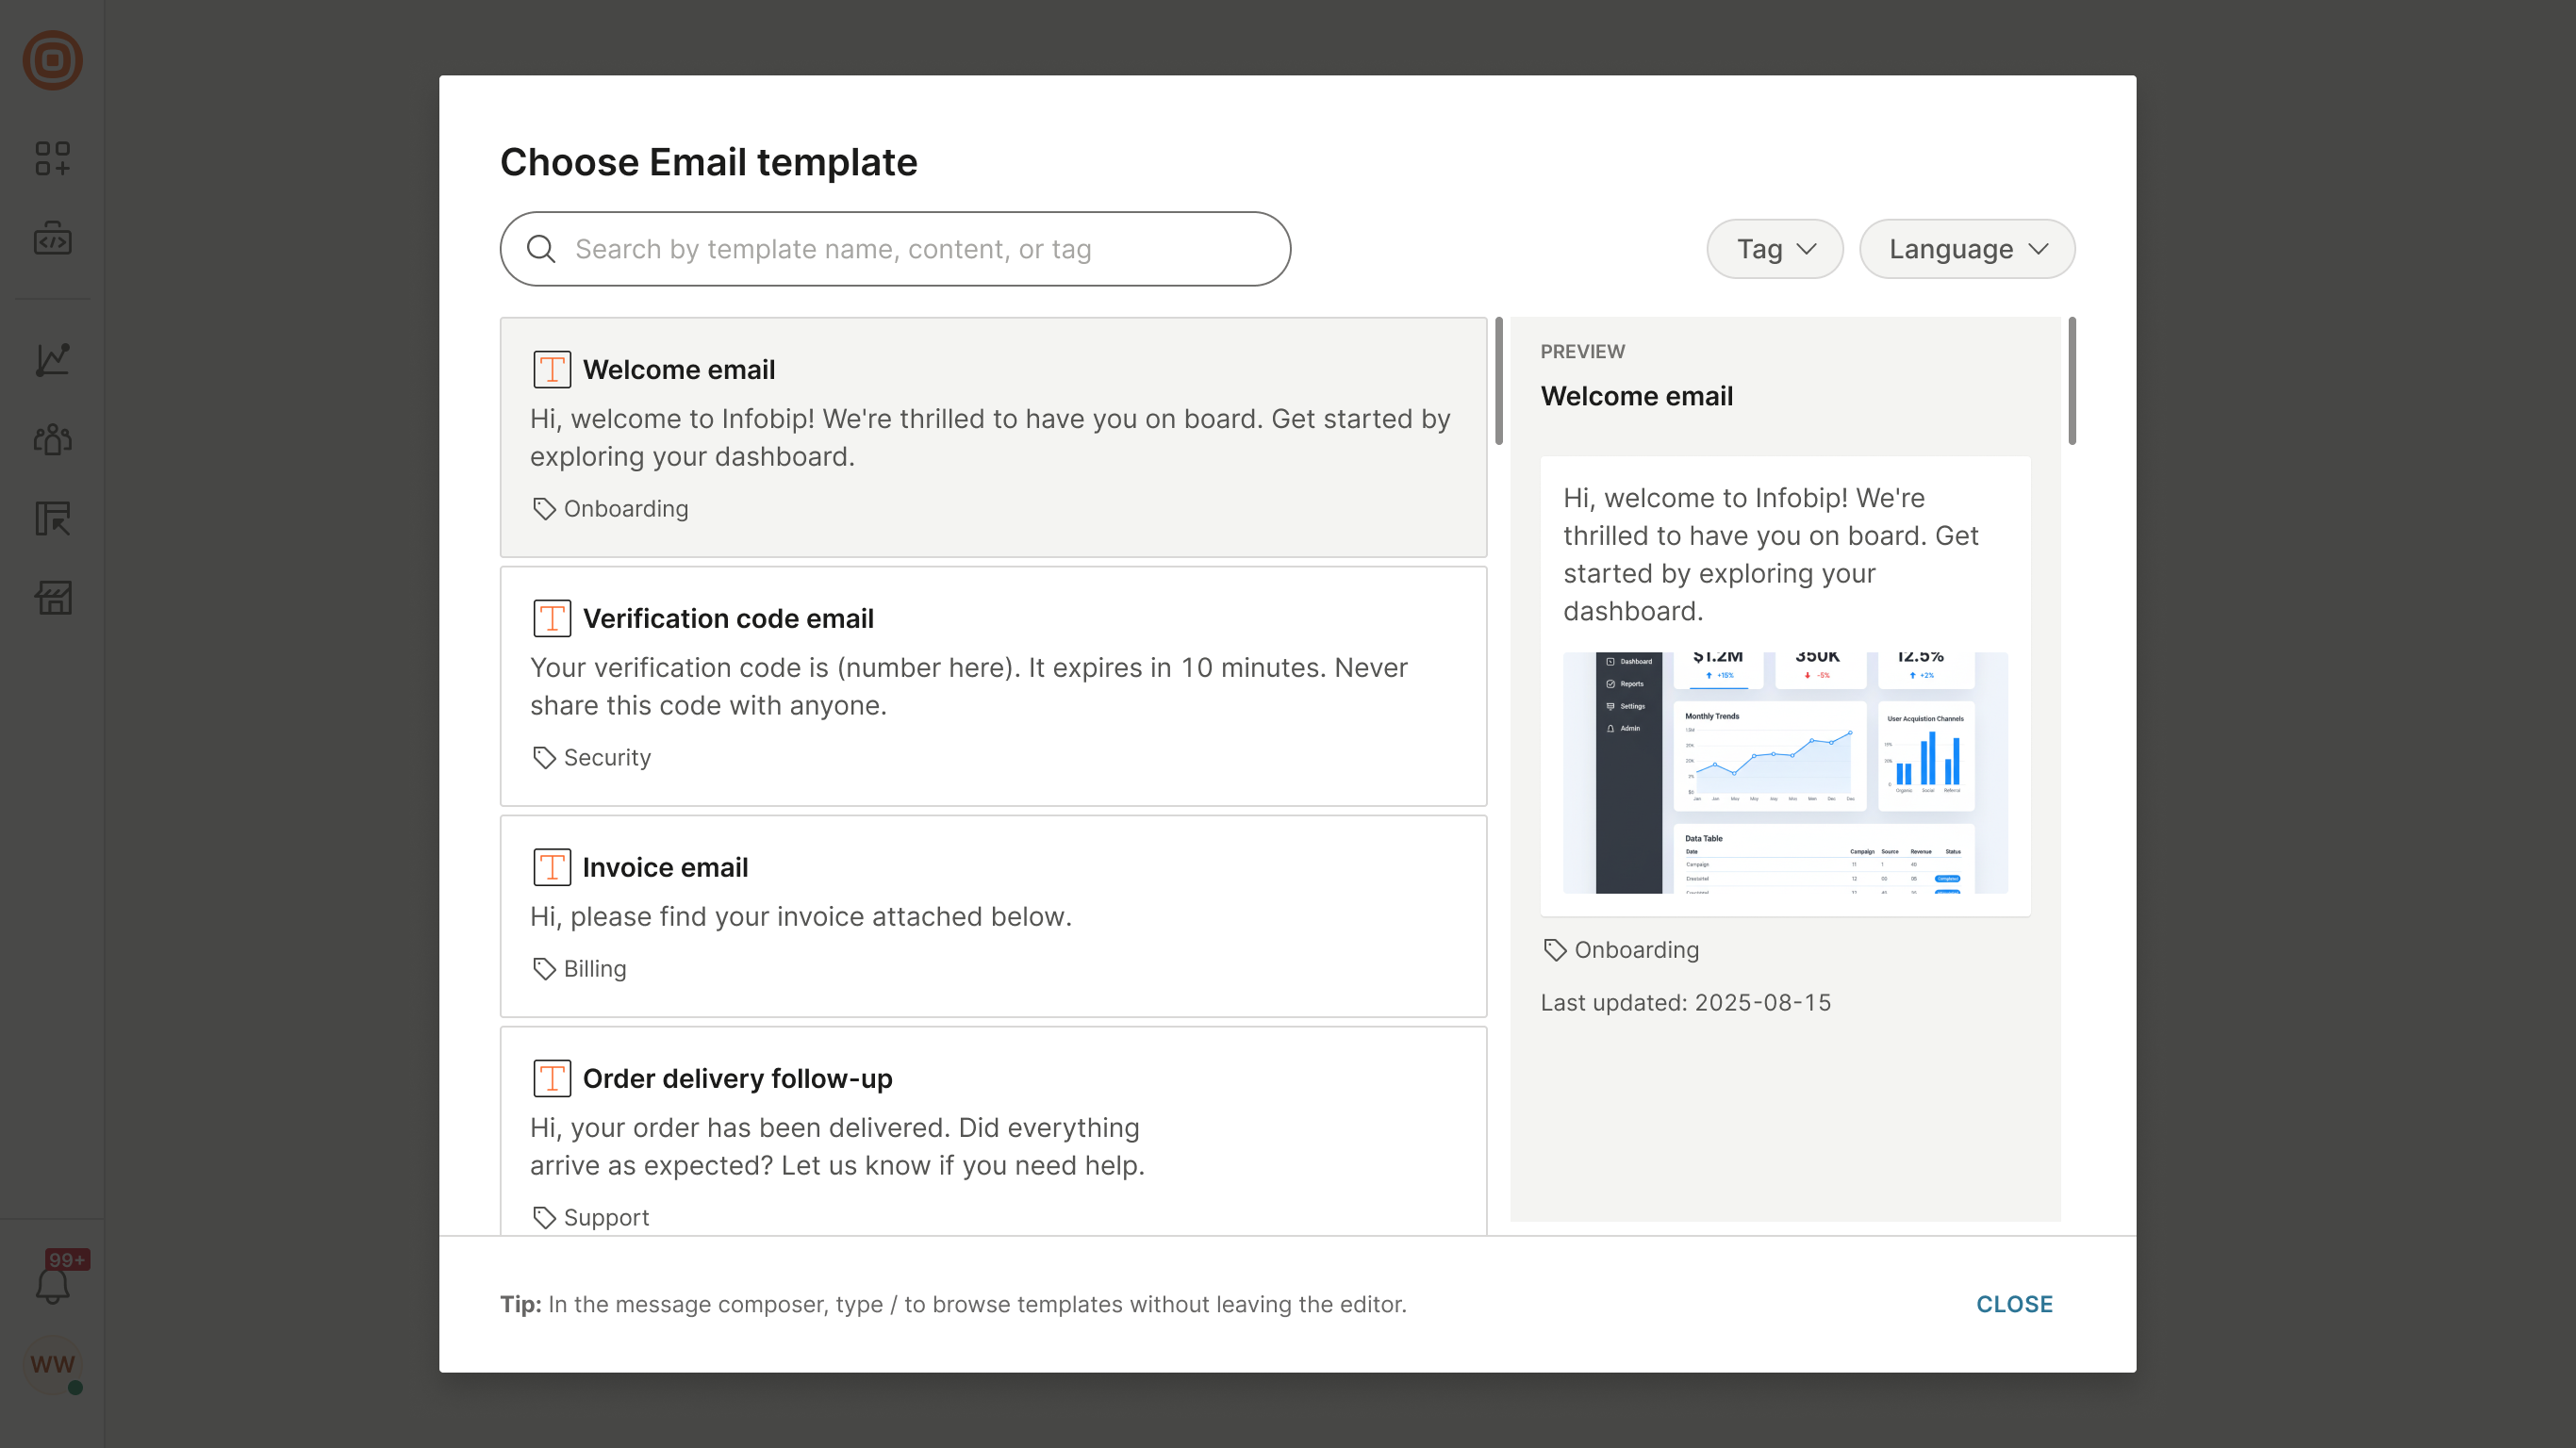
- Select the template to add it to your reply. Its content, along with any attachments, loads directly into the message composer.
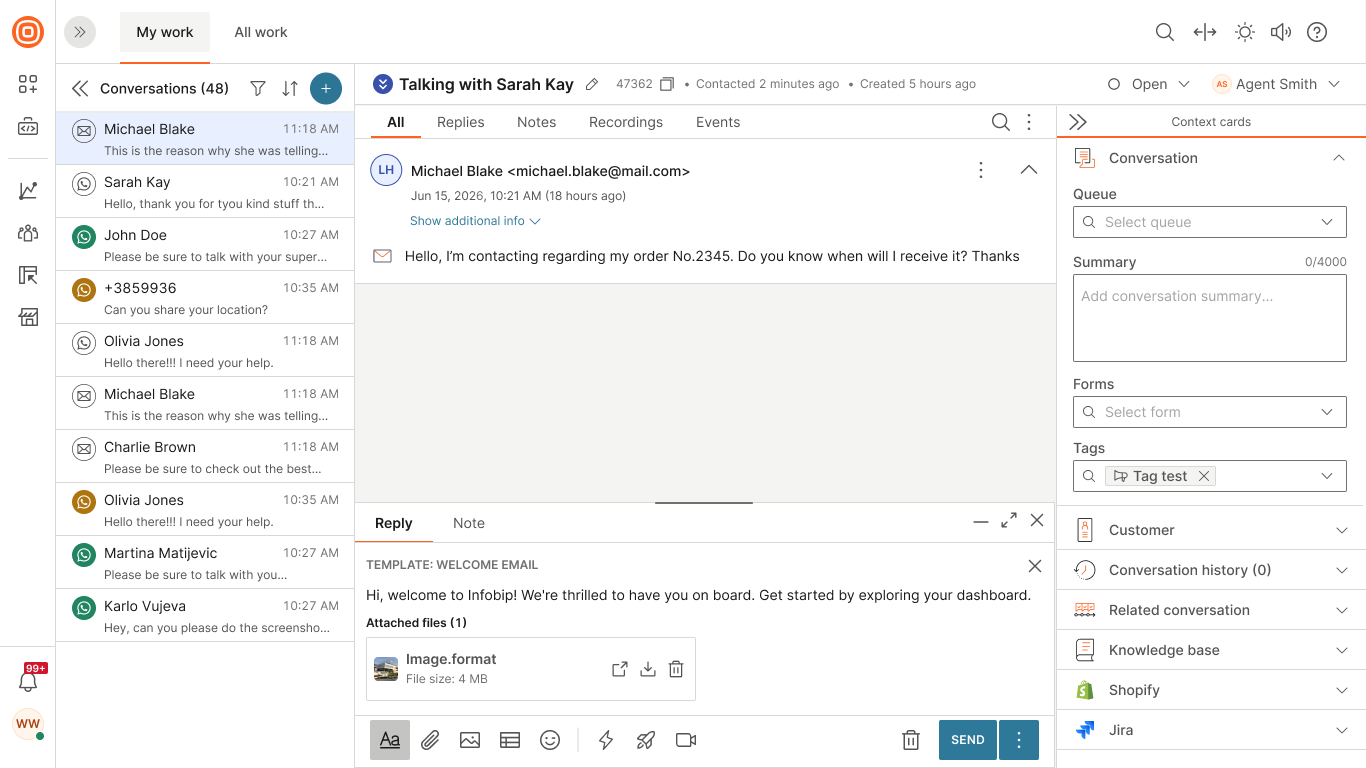
- Once a template is selected, you can modify its text before sending. For WhatsApp pre-registered templates, see Send a message using a WhatsApp template below.
- Select the Send message button to reach out to the customer.
Send a message using a WhatsApp template
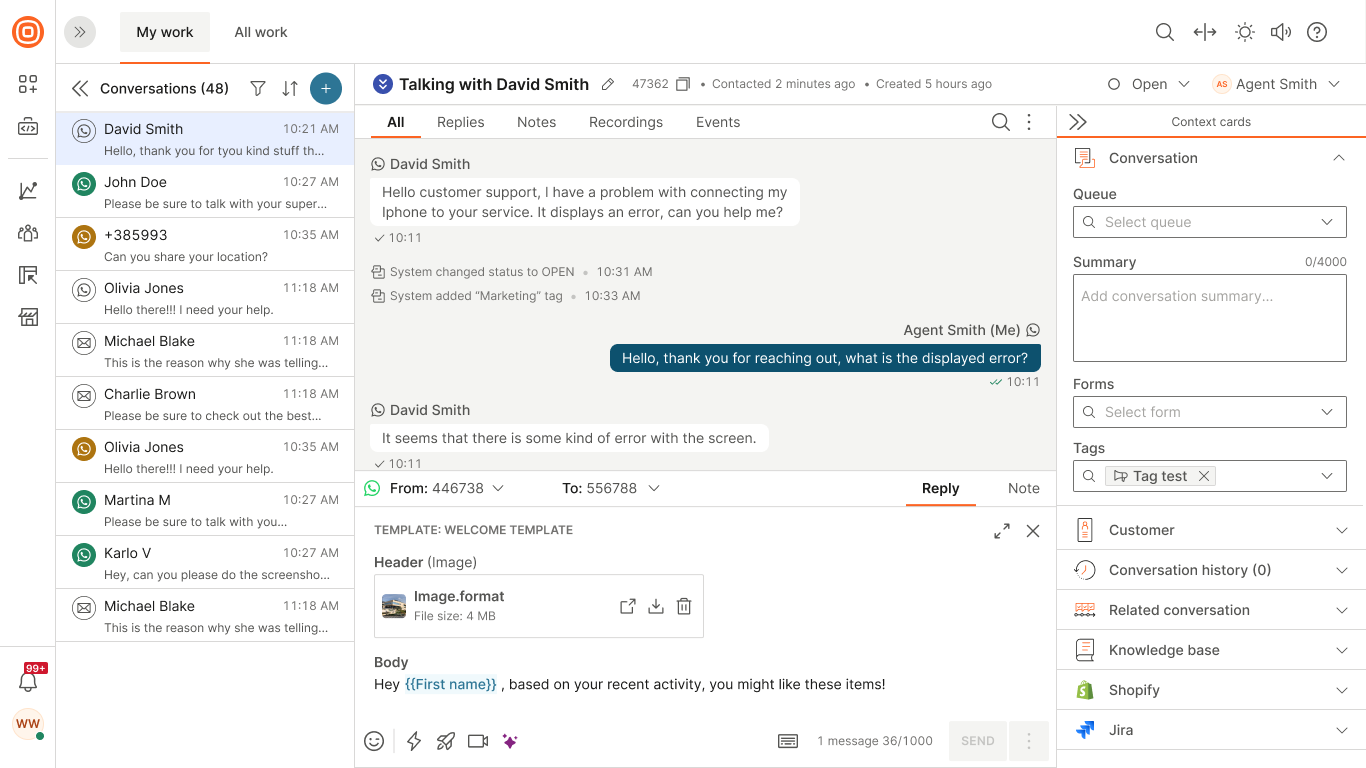
Use a WhatsApp template when sending the first message to a customer or when more than 24 hours have passed since the customer’s last message.
Once selected, the template appears in the message composer. Agents can preview templates in the template picker before selecting one.
Agents cannot edit the template text and can modify only variable fields set by the supervisor as editable. If a variable field is not automatically filled (for example, when a People attribute does not match the given customer), the agent must fill it in manually.
If the template includes media placeholders that the supervisor has left editable, agents must add the required media (image, video, document, or location) before sending the message, in accordance with WhatsApp rules.
First interaction with a customer
- Go to Inbox → My Work.
- Select the + button and choose Start a new conversation.
- (Optional) Add a topic.
- Select the WhatsApp number you are sending the message from and the customer’s WhatsApp number.
- Select Choose a message template.
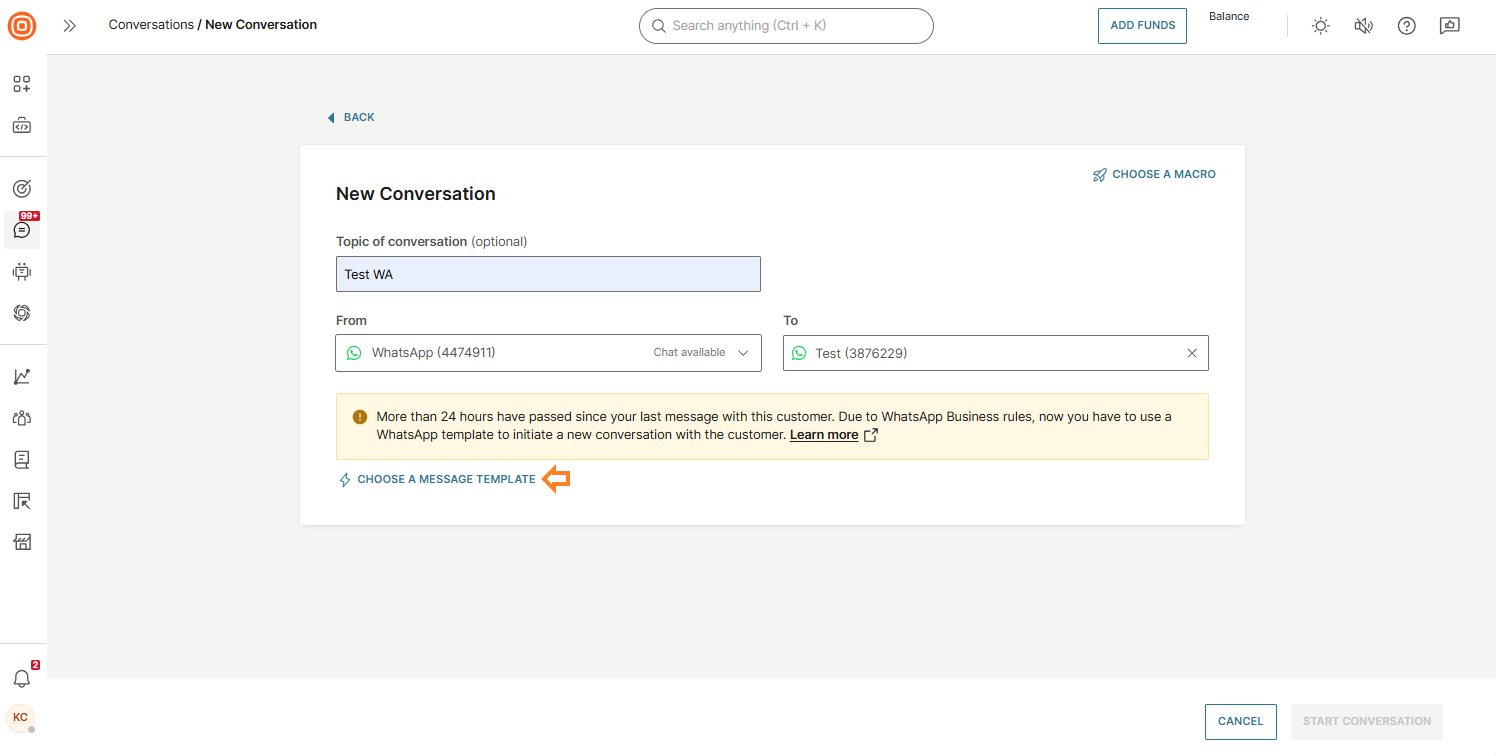
- Choose a template from the list of approved WhatsApp templates.
- Select Start conversations.
After more than 24 hours since the last customer message
- Open the existing conversation.
- In the message reply box, click the Select template option.
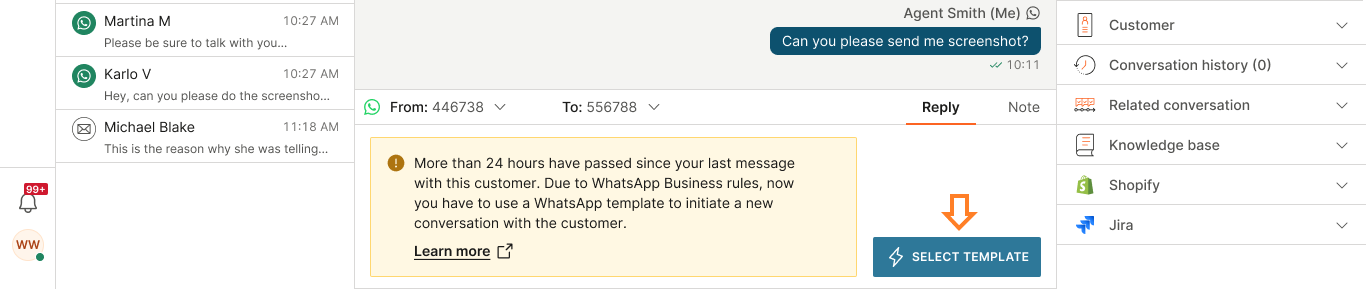
- In the pop-up window, choose a template from the list of registered and approved WhatsApp templates.
Complete and send the message
- Fill in values for all placeholders. Select the highlighted area of the text and enter a value.

- If enabled by the template configuration, add missing media (image, video, document, or location).
- Send the message.
To learn more about creating and managing templates, see Templates.