Create your RCS sender
To send RCS messages, you must create an RCS Business Messaging sender. Follow the steps below to create a sender and verify your business identity.
You can create a sender in two ways:
- Infobip web interface: Guided self-service with smart validation. The system checks your inputs, including file formats and image sizes, in real time. If a logo or banner does not meet the required specifications, the system prompts you to correct it before submission.
- Infobip API for RCS: Use the Create RCS sender API to automate registration or integrate it into your systems.
Watch the demo video below to see how to create an RCS sender and safelist your test number:
How to create an RCS sender
Follow these steps to register your RCS sender.
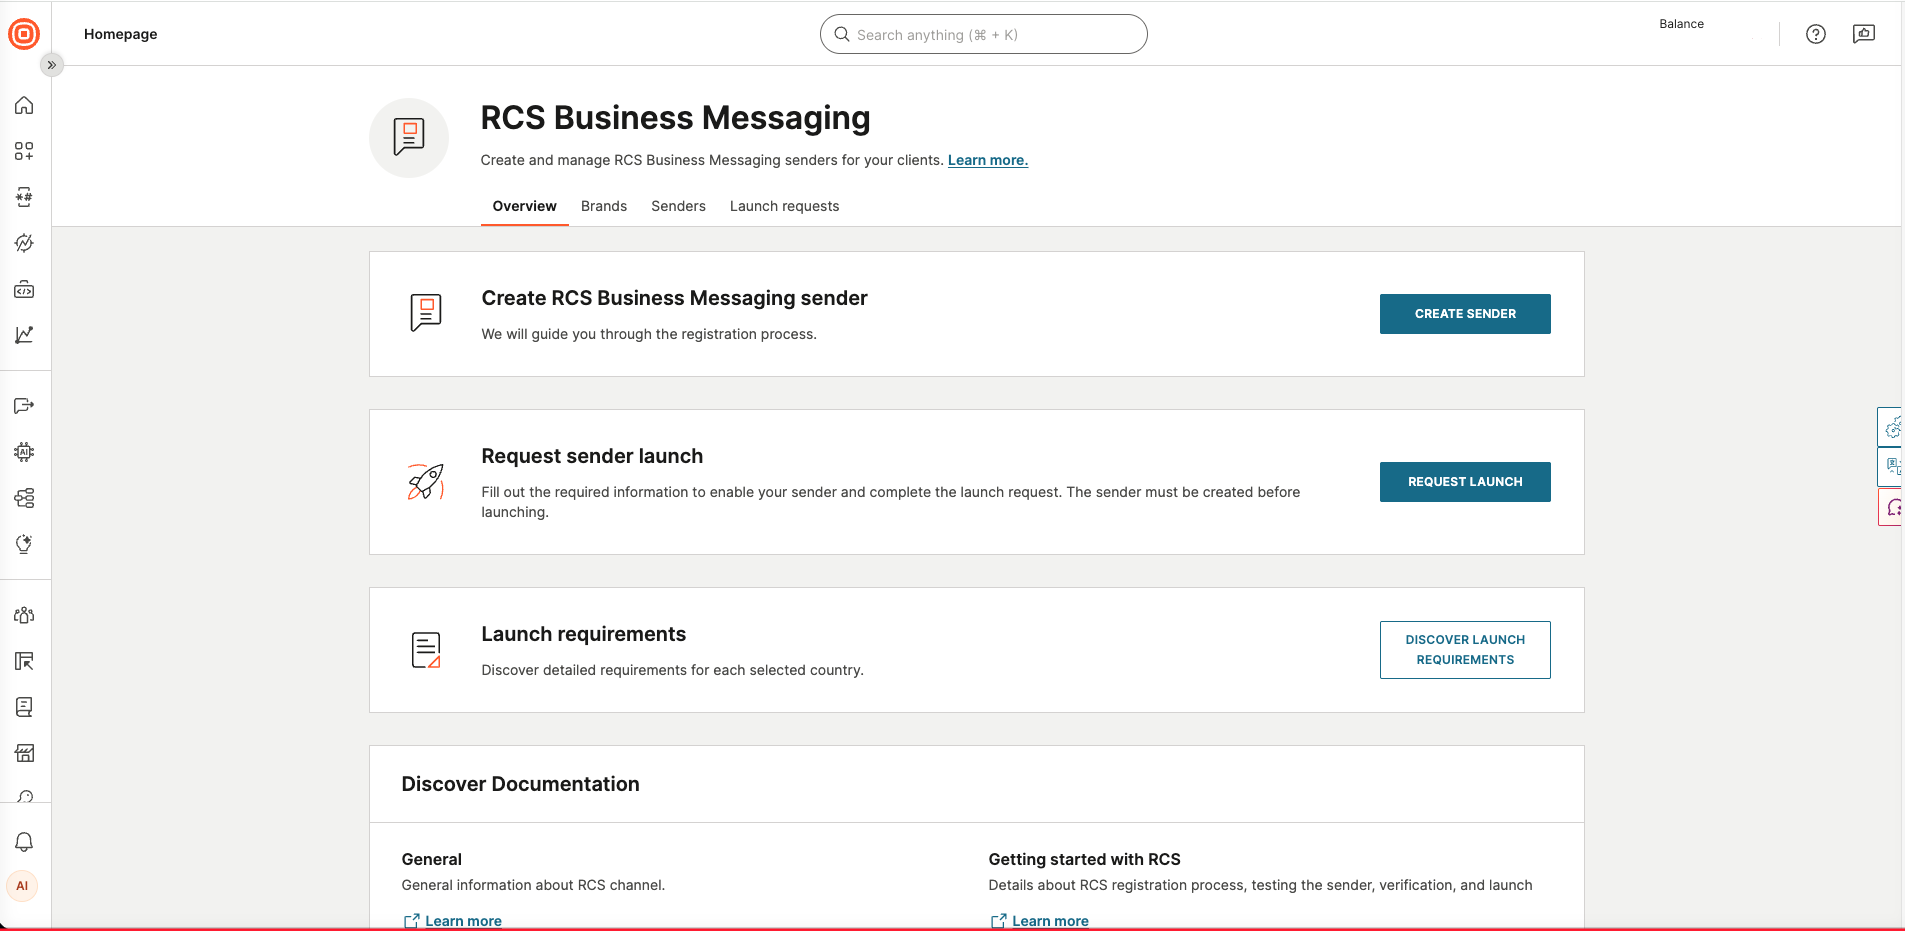
- In the web interface, go to Channels and Numbers > Channels.
- From the list of available channels, select RCS Business Messaging.
- In the Create RCS Business Messaging sender section, select Create sender to open the sender creation form.
- Complete the sender creation form.
The sender creation form includes required details for the RCS sender setup.
RCS sender details
Field | Description |
|---|---|
Sender name |
|
Brand |
|
Defines how messages from the sender are billed: | |
Hosting region |
|
Use case |
Defines the message type: |
RCS public profile details
The profile preview panel shows how your sender appears to the end user.

Display and visual identity
| Field | Description |
|---|---|
| Display name | Sender name shown on the end user’s device. Use a sender name that clearly represents your brand so end users can easily recognize who the message is from. If your brand uses multiple sender names, add details to distinguish each sender. Follow channel-specific requirements when setting sender names. |
| Description | Short text summary displayed on user devices that explains the use case of your RCS sender. |
| Color | Main icon theme color in hex format (for example, #000000). The color must meet accessibility contrast requirements with a ratio of at least 4.5:1 against white text.For more information, see the W3C accessibility guidelines on minimum contrast. |
| Banner image | JPEG/JPG format, 1440 × 448 px, max 200 kB. Appears at the top of the sender profile. |
| Logo image | JPEG/JPG format, 224 × 224 px, max 50 kB. Appears as the sender’s avatar. |
Contact details
| Field | Description |
|---|---|
| Primary phone number | End-user support number. Accepts E.164 format (for example, +1234567890) or local/national format (for example, 1234567). Numbers with + must be valid E.164 with known network prefix. Numbers without + must be 3-20 digits. Spaces, dashes, parentheses, and dots are automatically removed. Emergency numbers are not allowed. |
| Label for phone | Display label for the phone number. |
| Primary email | Brand's email address in a valid email format. |
| Label for email | Display label for the email address. |
| Primary website | Public website for the brand. Must start with http:// or https://. |
| Label for website | Display label for the website. |
Legal details
| Field | Description |
|---|---|
| Privacy policy URL | Direct link to the brand's privacy policy. Must be public and start with http:// or https://. |
| Terms of service URL | Direct link to the brand's terms of service. Must be public and start with http:// or https://. |
Create your sender or save draft
After you complete all required fields, select one of the following options:
- Create sender: Submits the sender for registration. This action creates an Agent on the Google platform.
- Save as draft: Saves your progress so you can complete the registration later.
Track sender status
After you create a sender, you can monitor its progress through the following statuses.
To check the status of your sender:
- In the web interface, go to Channels and Numbers > Channels > RCS Business Messaging.
- Open the Senders tab.
- Locate your sender and check its status.
Sender statuses:
| Status | Description |
|---|---|
| Draft | Sender details saved but not submitted for registration. Sender is editable. |
| Pending | A registration or update request has been submitted and is being processed. Sender is locked during processing. |
| In testing | The sender has been approved for testing. The sender is unlocked for editing, and you can add test devices and send test messages. If a launch attempt fails (all providers reject), the status returns here. |
| Pending launch | Launch has been requested. The sender is locked and cannot be edited. |
| Update required | After a launch request, an update to the sender is required before launch can proceed. The sender is unlocked for editing. |
| Launched - In progress | At least one provider has completed the launch process, and launch with the remaining providers is in progress. • Properties are locked, except for platform parameters. • Adding test devices and sending traffic to test devices is enabled. |
| Launch - Partial success | This status applies when any of the following conditions are true: • All providers have completed the launch process, with some approved and others rejected. • An additional provider becomes available in a country where the sender is already launched. • A provider has a Not Requested or Excluded status. You can request launch to additional providers from this status. • Properties remain locked, except for platform parameters. • For countries where the sender is not launched: you can add test devices and send test traffic. • For countries where the sender is launched: use production traffic. The system removes any test devices that were previously added in those countries. |
| Launched | The sender is live and approved for launch in at least one country. • Production traffic is enabled for approved countries. • For countries where the sender is not launched: you can add test devices and send test traffic. • For countries where the sender is launched: adding test devices and sending test traffic is not available. Any test devices previously added in those countries are removed. |
Edit or submit your sender for launch
- Edit sender: Available when status is Draft, In testing, or Update required.
- Go to the Senders tab, select your sender, and choose Edit sender.
- Request launch: Available after your sender has been tested (In testing status).
- Go to the Senders tab, select your sender, and choose Request launch.
Before requesting a launch, review the launch requirements for your target countries.
Configure inbound actions and keywords
Configure actions and keywords for inbound messages to automate message processing and reduce manual handling. You can set up specific actions (such as forwarding to an HTTP endpoint) and define keywords to trigger those actions.
To configure inbound actions and keywords for RCS:
- In the web interface, go to Channels and Numbers > Channels.
- Select RCS Business Messaging and go to the Senders tab.
- Choose the sender and select the ⋮ (three dots) menu > Edit configuration.
- Configure the inbound actions and keywords as needed.
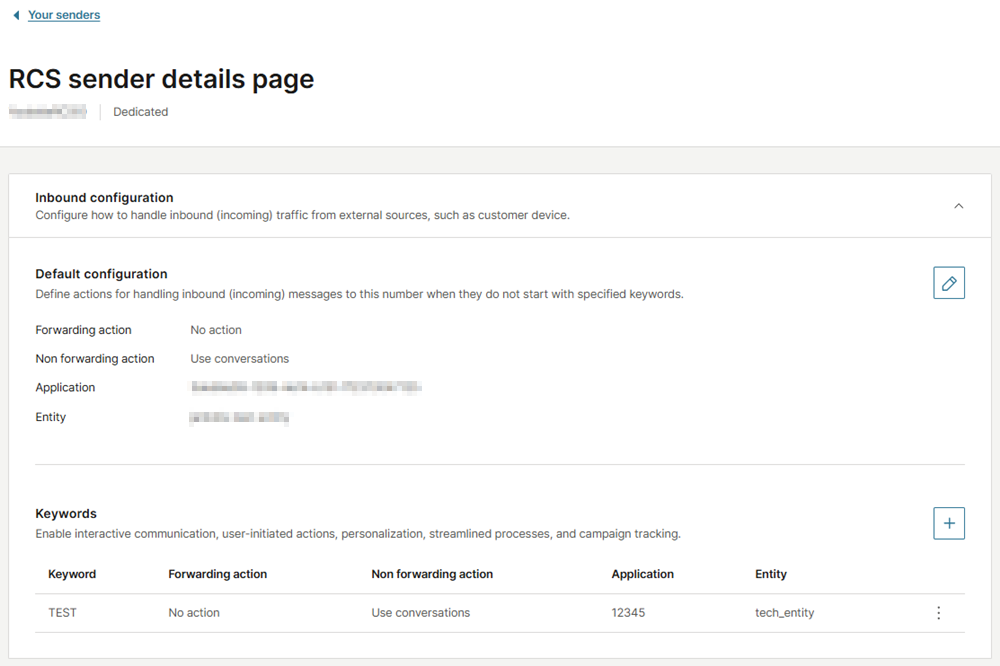
Supported actions for RCS
You can configure different types of actions to handle inbound messages from RCS. Expand each section below to view the available actions and their descriptions.
For more information, see Messaging actions and Keywords.